I’m researching alternative methods to update the application on my RACK5010. I’m using a custom firmware burned by JFlash, then Arduino IDE to put on my custom application. All that works fine.
However after building my device I do not have access to the USB port. I’ve tried to get Bluetooth OTA to work but haven’t been successful. Can the RAK5010 be updated with both the bootloader and application at the same time using JFlash?
What are my alternatives? I’d like to get Bluetooth to work but all the samples are proving not to do what I need. I can see the device but not able to put it in bootloader mode and upload an application.
I think I’m close to getting this to work, but when I connect w/ the Bluefruit Android app or the nRF Connect application, I’m not able to put the device in DFU mode to upload the application.
There is a timeout with OTA Update via BLE. But I assume that you quickly try to upload as soon as the power is powered up. I am having issue on uploading the arduino bootloader hex on my RAK5010 board. I am getting a new RAK5010 to test. I’ll update you asap on whatever I’ll found about it and also on the DFU and FRST pins, etc. Btw, your application code runs ok right? Did you try the basic OTA Update example?
I got a new RAK5010 and uploaded the latest Arduino_adafruit_bootloader using RAKDAP1 hardware. I tried the original hex in the RAK5010 github guide but the BLE disconnects and can’t proceed on the update.
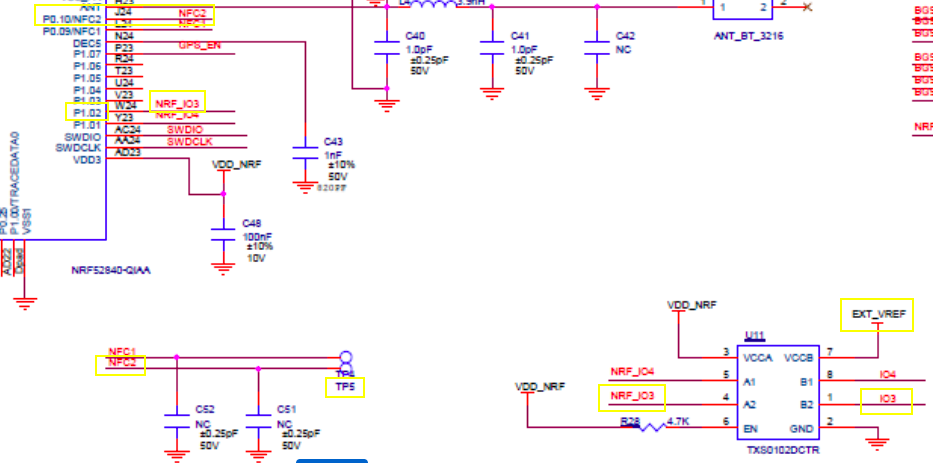
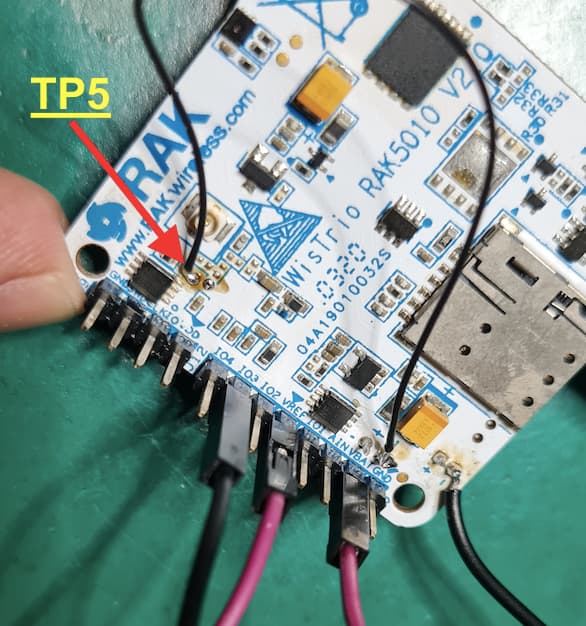
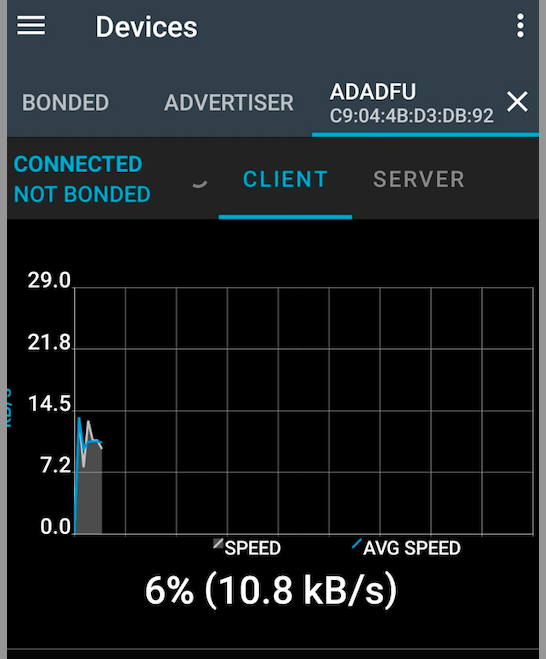
The closest I got is when I force the DFU OTA via putting the DFU and FRST pins to low state. You can try it but you have to solder on TP5 to GND level. If you do that, you should be able to detect ADADFU. You can try to upload your .zip and see the result. It starts uploading but it stops at low percentage write. I suggest you try and see for yourself. It might give you some clue.
With regards to the DFU and FRST pins, we are using the one for the nrf52840_express from adafruit’s firmware release. You can map it to IO4 and IO3 but you need to recompile it. For quick test, I didn’t do that. Also instead of modifying the PCA10056 variants h and c file, you should update the one for the nrf52840 express and select it as board in your Arduino code. I hope you can search for possible reason why it disconnects or we can also see if it will not disconnect in your board
Carl - thanks for the assistance. With some research I was able to successfully upgrade the application OTA.
I’m also using the original Bootloader from here:
The newer bootloader may also work, however I stuck with what we have been testing with.
Instead of soldering pins and controlling the DFU and FRST pins to low state, I read this:
The GPREGRET register can also be set to force the bootloader can enter any of above modes (plus a CDC-only mode for Arduino). GPREGRET is set by the application before performing a soft reset.
#include “nrf_nvic.h”
void reset_to_uf2(void) {
NRF_POWER->GPREGRET = 0x57; // 0xA8 OTA, 0x4e Serial
NVIC_SystemReset(); // or sd_nvic_SystemReset();
}
In the Setup() function I read the state of one of the IO ports. If it is “engaged”, then I run the above code and put the device in OTA/Update mode.
The nRFConnect Android application will NOT work (as it is today). It’ll connect to the RAK5010, however it will not correctly upload the ZIP package.
I’m using the BlueFruit Android application. (Adafruit, Bluefruit LE Connect v3.3.2). I can connect to the RAK5010, then click on Update, select a custom firmware, select the .HEX and .DAT files and upload to the RAK5010. It reboots and has the most current version of my application!
Almost there… two final questions (I hope).
What is the best way to add a pushbutton switch to the RAK5010? Currently I’m using IO4 pinMode(PIN_NRF_IO4, INPUT); and putting the button between the IO4 PIN and VDD. When connected to VDD I get a TRUE, disconnected I get a FALSE.
Do you want me to write this up? If so, send me a private email.
The VREF should be connected to a external positive voltage source higher than 1.8V. It can be to VBAT or 3.3V whatever VDD level you use for the pull-up resistor.