Hello there
I’m fairly new to LoRa/LoRaWAN and its part of my college internship, and in short, i need help with setting up a RAK811 with an arduino uno; i know this has probably been asked many times here - I’ve been checking the other topics about simillar issues, and even after following most of the tips/solutions it still does not work.
I have a V1.2 WisKey RAK811, it works fine by AT with the RAK Serial Port Tool, and it sends just fine, problem starts when i try with the arduino. I’ve tried:
Mounting the RAK on top of the arduino
Connecting both to the pc by cable and only connecting the TX/RX, to which i’ve done 2>RX / 3>TX, 0>RX / 1>TX (and the opposite 1>TX / 0>RX as some other topics suggested)
Connecting only the arduino and connecting the 5V to 5V of the RAK811 and GND to GND
I have the most recent firmware, and i’ve recently downloaded the new and improved arduino library (from a post not long ago). I’m just unsure that the problem is due to the code (i’m using one of the examples from the libraries) or from wiring. I’d also like to know if it’s possible to connect and program sensors directly to the RAK811
Any help would be greatly appreciated, thanks in advance
Hello @Fomi
Yes i have followed that topic very closely and it still does not work with those connections and the library linked in the topic.
Even after altering the library a bit to my regions band (EU868) and the SoftwareSerial as in the post linked, i get no response from the RAK811; When i try and run a simple AT command such as getting the version (by sending it through arduino IDE serial) i get a blank return message
Hi Mplank,
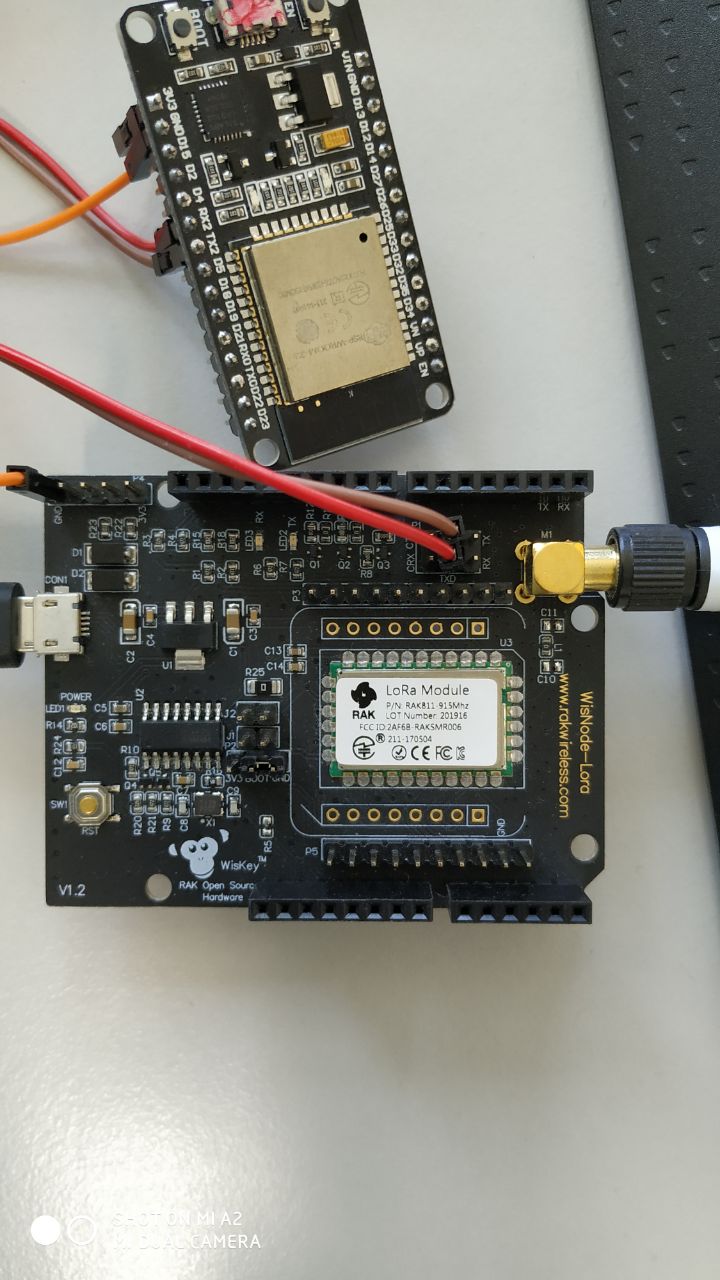
I have WisNode-Lora and I followed the topic but no luck!
I tested the connections between RAK811 chip and the headers using AVO meter, but it appears there is no connection.
also there is no documentation at all about the header or the schematic.
Finally I was able to connect the node to ESP32 successfully by connecting the Rx,Tx directly to the jumper as in the photo, and I changed the UART baude rate to 9600
changing the baude rate will help you to avoid many problems.
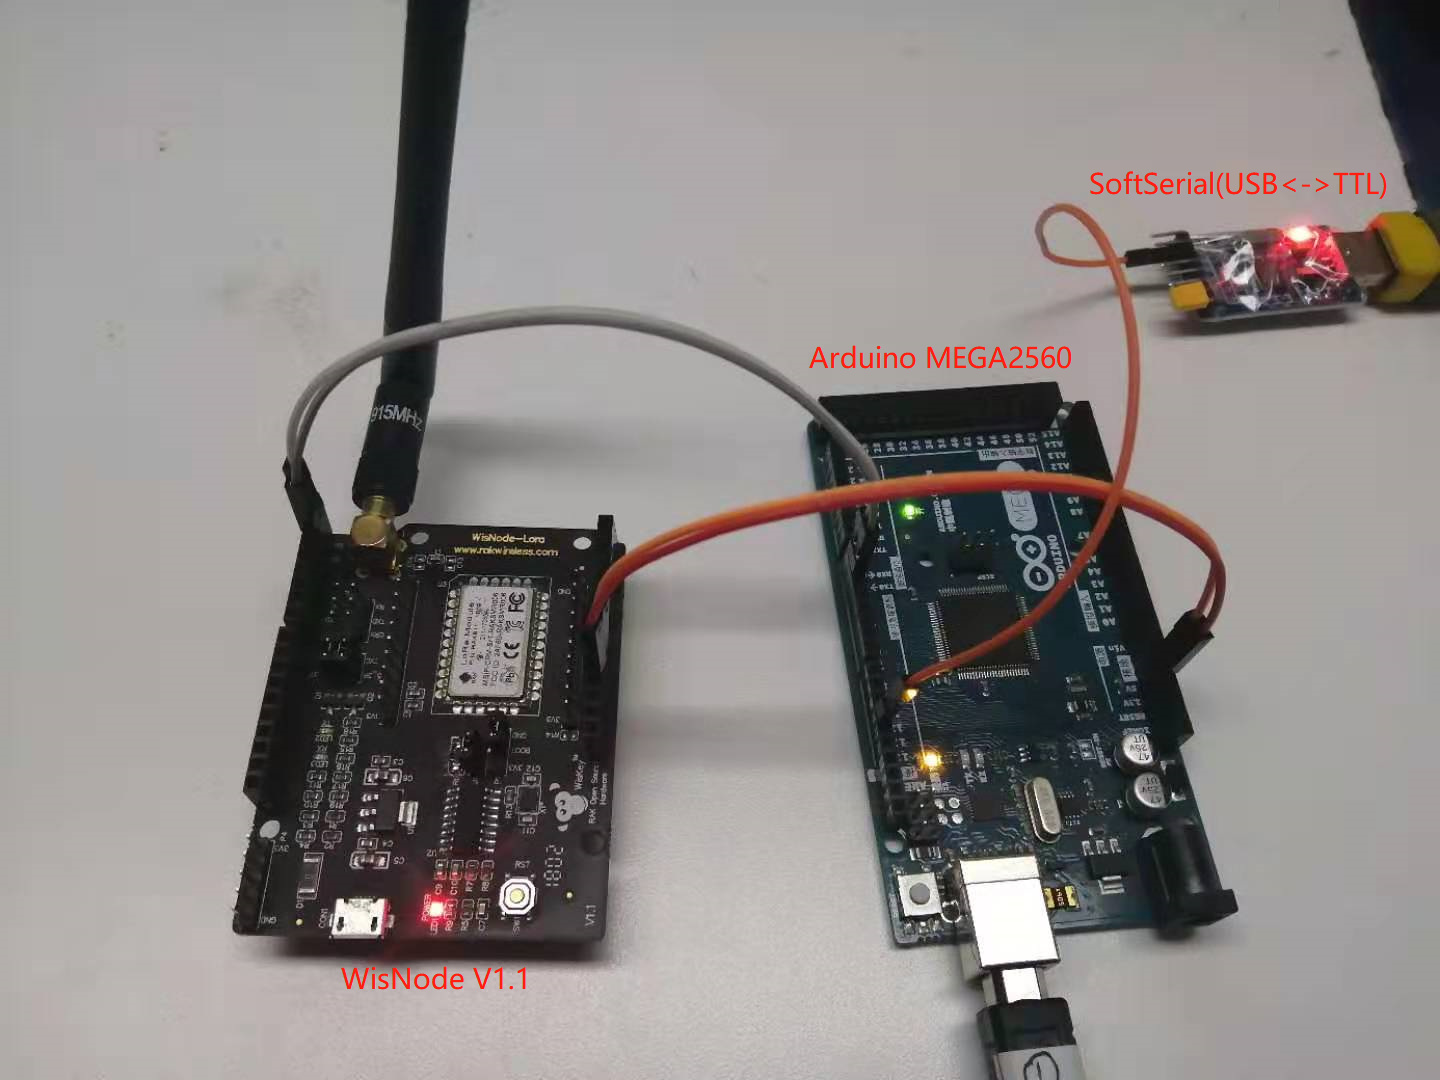
We’ve just use an Arduino board connecting with Wisnode-LoRa board to connect with LoRa gateway in OTAA mode successfully.
I will write a document to show more details about how to use it tomorrow. Please wait.
Thank you for the reply @Mustafa!
Unfortunately I dont have a ESP32, but I will try it with a ESP8266 tomorrow and test my luck
May I ask what code did you upload to the ESP (is it one of the examples on the topic linked?), and if you powered both boards?
Hi Mplank,
You can use any micro-controller you want.
I’m using MicroPython, I wrote a code just to send AT commands to the WisNode and print the response for testing.
yes I powered both boards and make common GND, because me ESP32 is the cheap one, I don’t think it can supply both boards.
I have the same problem like the others here and I can’t get it working…
@Fomi: Have you tried your library with an Arduino UNO? It somehow feels like there is a difference.
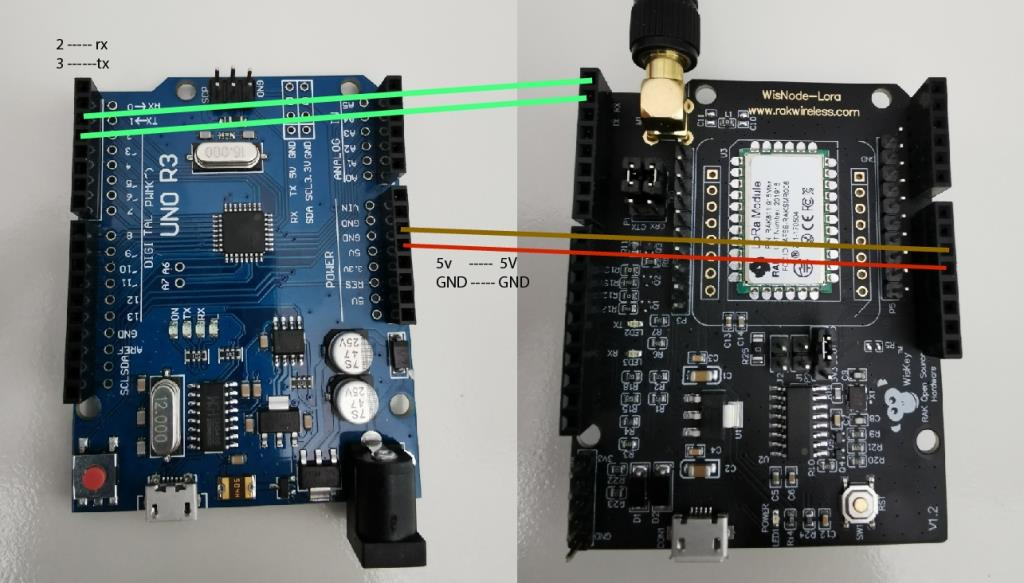
I am using an Arduino UNO with a WisNode LoRa RAK811 board V1.2
Wiring
UNO GND <–> WisNode GND
UNO 5V <–> WisNode 5V
UNO 2 <–> WisNode RX
UNO 3 <–> WisNode TX
Jumpers (WisNode)
RXD <–> TX
TXD <–> RX
I tried it using your library and I tried doing it on my own by extracting the important parts from your library, but i am receiving an empty string after sending “at+version”…
What you need to do is program the Arduino to do EXACTLY the same thing as the Serial Tool when you issue commands.
So you need to connect the Arduino to the RAK811 serial port and use the RAK supplied library that will do most of the coding work for you:
There are three things to pay real attention to:
You will need to MANUALLY set the Baud rate of the RAK811 to 9600 BEFORE you start - the Arduino can’t talk at 115200 - you aren’t sending much info over the serial link, so 9600 isn’t as slow as it sounds.
The block that sets the working mode in the Arduino script needs to be removed - when you set the working mode, the RAK module will need restarting / resetting - which isn’t allowed for in the library so it will just stop there. Set this manually whilst you are setting the baud rate. You only need to do this once as the module will remember the settings you set.
You will need some sort of level convertor if you have an Arduino Uno, Nano or indeed other that runs at 5V as the RAK811 runs at 3.3V and you don’t want to release the magic smoke.
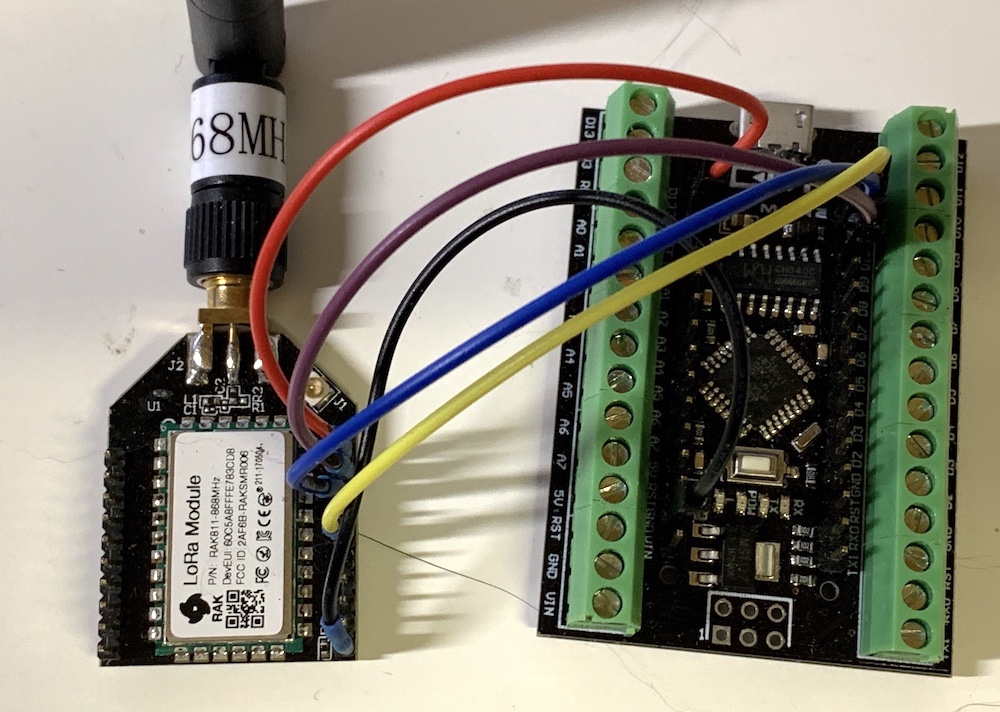
If you have the Wisnode/Arduino Shield, the library provides all the information you need, including what jumpers to set depending on which version you have. If you just have a breakout modules, here’s mine:
You’ll see that I have in fact wired in a reset and that I’m so rich, I live life to the edge and don’t bother with a level converter. Please look at the RAK811 breakout module info and an Arduino Nano pinout to figure out the micro-details of the connections.
I have a question. How do you this?
I mean, I only take out the #define WORK_MODE LoRaWAN from the code? or I have to modify something from the library?
“The block that sets the working mode in the Arduino script needs to be removed - when you set the working mode, the RAK module will need restarting / resetting - which isn’t allowed for in the library so it will just stop there. Set this manually whilst you are setting the baud rate. You only need to do this once as the module will remember the settings you set.”


 I always used the wrong AT command to change the baudrate from 115200 to 9600!