Please include the following information, in order for us to help you as effectively as possible.
What product do you wish to discuss?
Rak11160
What firmware are you using? (RUI3 or Arduino BSP or other IDE (e.g. STM32CubeIDE)?
Arduino
Computer OS? (MacOS, Linux, Windows)
Windows
Query:
Im planning to use this RAK11160 to my project since its available now at lcsc , just gonna ask if i want to customize the code of the built in esp8684 by using arduino and the provision debugger/programmer pins of uart supplemented by the guide plus using an external uart to ttl converter will i able to upload custom firmware , if it can please guide me on how or supplement any document that can help
The quick answer is yes. You can run a custom FW to RAK11160. However, the team that maintains Arduino ESP32 decided not to include official release for ESP32-C2 variant. This means you have compile the arduino-esp32 and enable C2 variant following this guide from espressif.
You can fully follow that guide but I can provide you compiled zip which you can already copy paste to your Arduino ESP32 installation. Avoiding that process.
Look for this location in your PC C:\Users\Carl\AppData\Local\Arduino15\packages\esp32\tools\esp32-arduino-libs\idf-release_v5.4-2f7dcd86-v1 then paste there this esp32c2. You can get it form here. You must extract the zip file.
After doing these, esp32c2 must be present already in that folder.
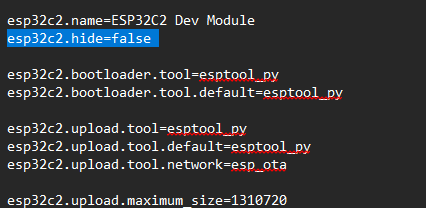
Then to make it appear on the board selection, open the boards.txt of your esp32 located here C:\Users\Carl\AppData\Local\Arduino15\packages\esp32\hardware\esp32\3.2.0, you must disable hiding the ESP32-C2.
Search for esp32c2.hide=true and make it false esp32c2.hide=false. This way ESP32-C2 will be shown in your board selection.
Once you do this the STM32WL must enable ESP32-C2. Also, you will now full take responsibility on how STM32WL and ESP32-C2 will communicate with each other.
Thank you for immediate support and a great help for this query.
Another clarfication once I finally had the esp32-c2 setup on my arduino ide.
There is a RAK1161 product which is a development board for RAK1160, in the datasheet part where the schematic design is provided. Is the GPIO 30 and 31 are the ESP programming port? and just need a serial to USB like CH340 together with its bootmode to be able to program it using arduino ide.
Again thank you for your support
If you are using RAK11161 which is a breakout board, you can use pins 30 and 31 which corresponds to ESP32-C2 GPIO19(RX) and GPIO20(TX) respectively for uploading your FW. 30 and 31 are just pin locations, they are not the GPIO numbers of ESP32.
To make things easier, there is a header provided for that UART as well as a ESP32 BOOT button.
That only thing missing on this is the reset of ESP32. This is internally controlled by STM32WL GPIO PA0. Therefore you must have a code in your RAK11160’s STM32 that control this pin. This is an internal connection and not accessible externally. If PA0 is low, ESP32-C2 is disabled and if high, it is active.
To do this, I use one GPIO of STM32WL as input to control the internal PA0. This is done because to enter bootloader mode of ESP32, you have to pull down ESP32 Bootpin then perform ESP32 reset.
Here’s a simple code where I use PA9 to control PA0(ESP32 Reset).
  if(digitalRead(PA9)==0)
  {
    digitalWrite(PA0, LOW); // or setEspPowerMode(POWER_OFF);
    Serial.println("Inactive");
  }
  else {
    digitalWrite(PA0, HIGH); // or setEspPowerMode(POWER_ON);
    Serial.println("Active");
  }