As you know, RAK has supplied an IoT SDK named RUI for users to customize their own firmware according to their personalized usecase, even they can make a personalized product easily based on RAK IoT modules like RAK811, RAK4200, RAK4600, RAK4400, RAK8212, and RAK5010.
RAK has supplied a set of RUI APIs which you can find here: https://doc.rakwireless.com/developer-tools/developer-tools/-
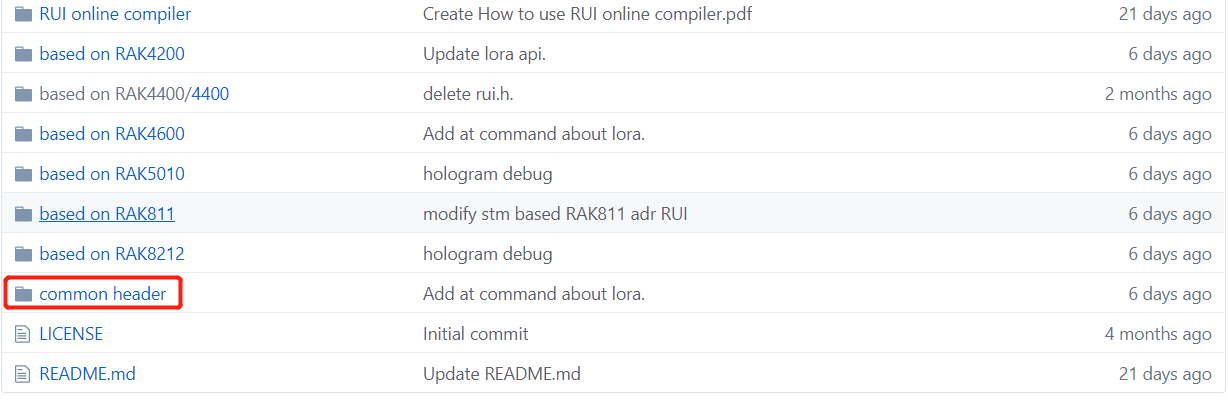
and some more and more product practice source code for reference:
Actually, you can think that RAK7204, RAK5205 and RAK7205 are some customized products which are customized by us based on RAK811 module according to the above resource, and we’ve open source the customized source code of them on Github (The above product practice source code link). So, you can customize a personalized product according to your good idea based on RAK IoT module surely.
RAK sincerely hope that “RUI software platform” + “RAK IoT modules” can help you to create more and more amazing IoT products!
I’ll update more and more information in this topic about RUI.
Thank you for using RAK products.
RAK team has developed a simple web version RUI online compiler which is much easier to use than the commandline compiler: http://47.112.137.11:12090/#/user/login
You can create an account by yourself now. More details, please have a look at the document “How to use RUI online compiler”:
Hi @Fomi
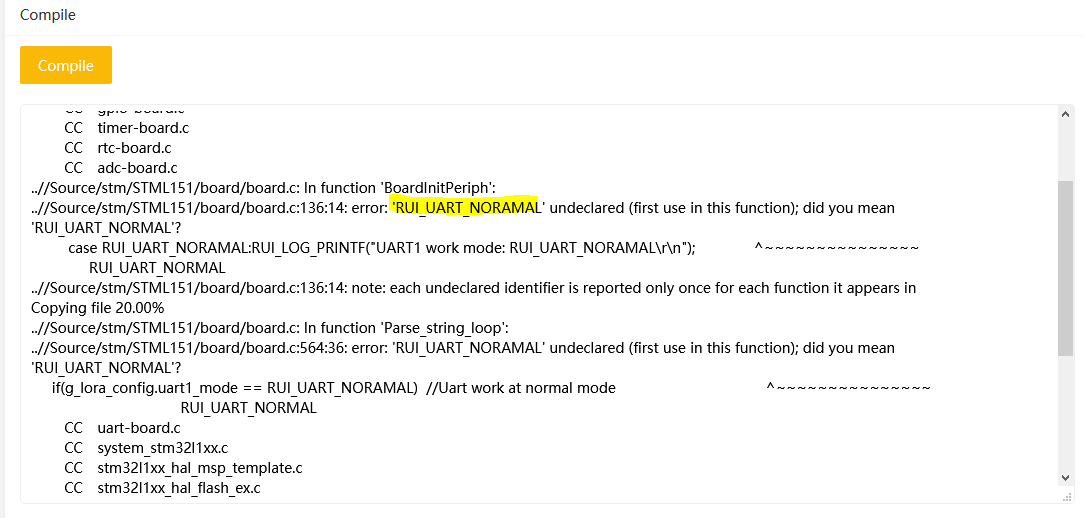
I think there is a problem with RAK RUI online compiler. It seems some files in its directory missing.
Below is the output log of online compiler:
mkdir _build
CC sx1276-board.c
CC gpio-board.c
CC rtc-board.c
CC timer-board.c
CC i2c-board.c
CC adc-board.c
CC spi-board.c
CC board.c
Copying file 20.00%
…//Source/stm/STML151/board/board.c:16:10: fatal error: rui.h: No such file or directory #include “rui.h” ^~~~~~~
compilation terminated.
stm/Makefile_stm32l151cb:246: recipe for target ‘_build/board.o’ failed
make: *** [_build/board.o] Error 1
make: *** Waiting for unfinished jobs…
Copying file 30.00%
Copying file 40.00%
Copying file 50.00%
Copying file 60.00%
Copying file 70.00%
Copying file 80.00%
Copying file 90.00%
Copying file 100.00%
I used the source files from Products_practice_based_on_RUI-master in RAKWireless GitHub.
Hey All,
I am seeing this error when I include and when I omit the rui.h file. Additionally I do not have a board.h, where should that file come from. The links to customizing the firmware above do not point to anything talking about customizing firmware. The links only go to configuring the gateway and nodes.
What does it take to get the RAK811_app running? Thus far I have added the rui.h to the directory, zipped it and used the online compiler.
Sorry, these links are old, and i’ve just updated them.
In a word about how to do customization, you just need to do your customized Application (or use RAK811_app on Github directly), and compile it on RUI online compiler.
Be carefully with theRUI ADC! because if you are working with batteries and your VCC isn’t 3.3V your calculations will be wrong, because RUI ADC functions assume Vref=Vcc=3.3v always. There is no way to use internal voltage source as Vref with RUI
you said two things that alerted my interest.
One: if you are using batteries your VCC isnt 3.3…can the RAK811 be powered with voltages above 3.3?
Two: can we use the a internal voltage source with the RAK811?
Yes, but probably no more than 3.9V which is the absolute max operating voltage of the semtech chip inside. I don’t know the absolute max of the other chips inside ( oscillator, power amplifier)
It is impossible for now to use the internal voltage source in RUI for RAK811. So basically ADC is useless if you plan to use RUI and disposable batteries ( ~3.0v )
Sadly, you are right. You need to have an external buck-boost board that can adapt to large voltage range input that will still have an output of 3.3v.
void setup() {
// put your setup code here, to run once:
Serial.begin(115200);
while ( !Serial ) delay(10);
Serial.println("\r\n*******************************");
Serial.println(“System Starting…”);
Serial.println("");
pinMode(ADC_pin, INPUT);
pinMode(ADC_pin2,OUTPUT);
//os_init();
}
void loop() {
// put your main code here, to run repeatedly:
float battery=analogRead(ADC_pin);
// int battery2=digitalWrite(ADC_pin2,HIGH);
Serial.print("Batery: ");
Serial.println(battery); //Serial.println(battery2);
delay(500);
}