Using Basic Station protocol (LNS) with Things Network

As some of you may know Things Network supports a new packet forwarded protocol called Basic Station.

Basic Station is based on Websockets and introduces extra security and stability compared to the old Semtech UDP protocol. Actually the creators of the original UDP protocol said it was an internal proof of concept which should never have been deployed. So this change is good news!

RAK7240 and RAK7249 firmware from release V1.1.0062_Release_r202 supports Basic Station, but instructions on how to use it have been hard to find. Well wonder no more, here they are in 3 simple steps:

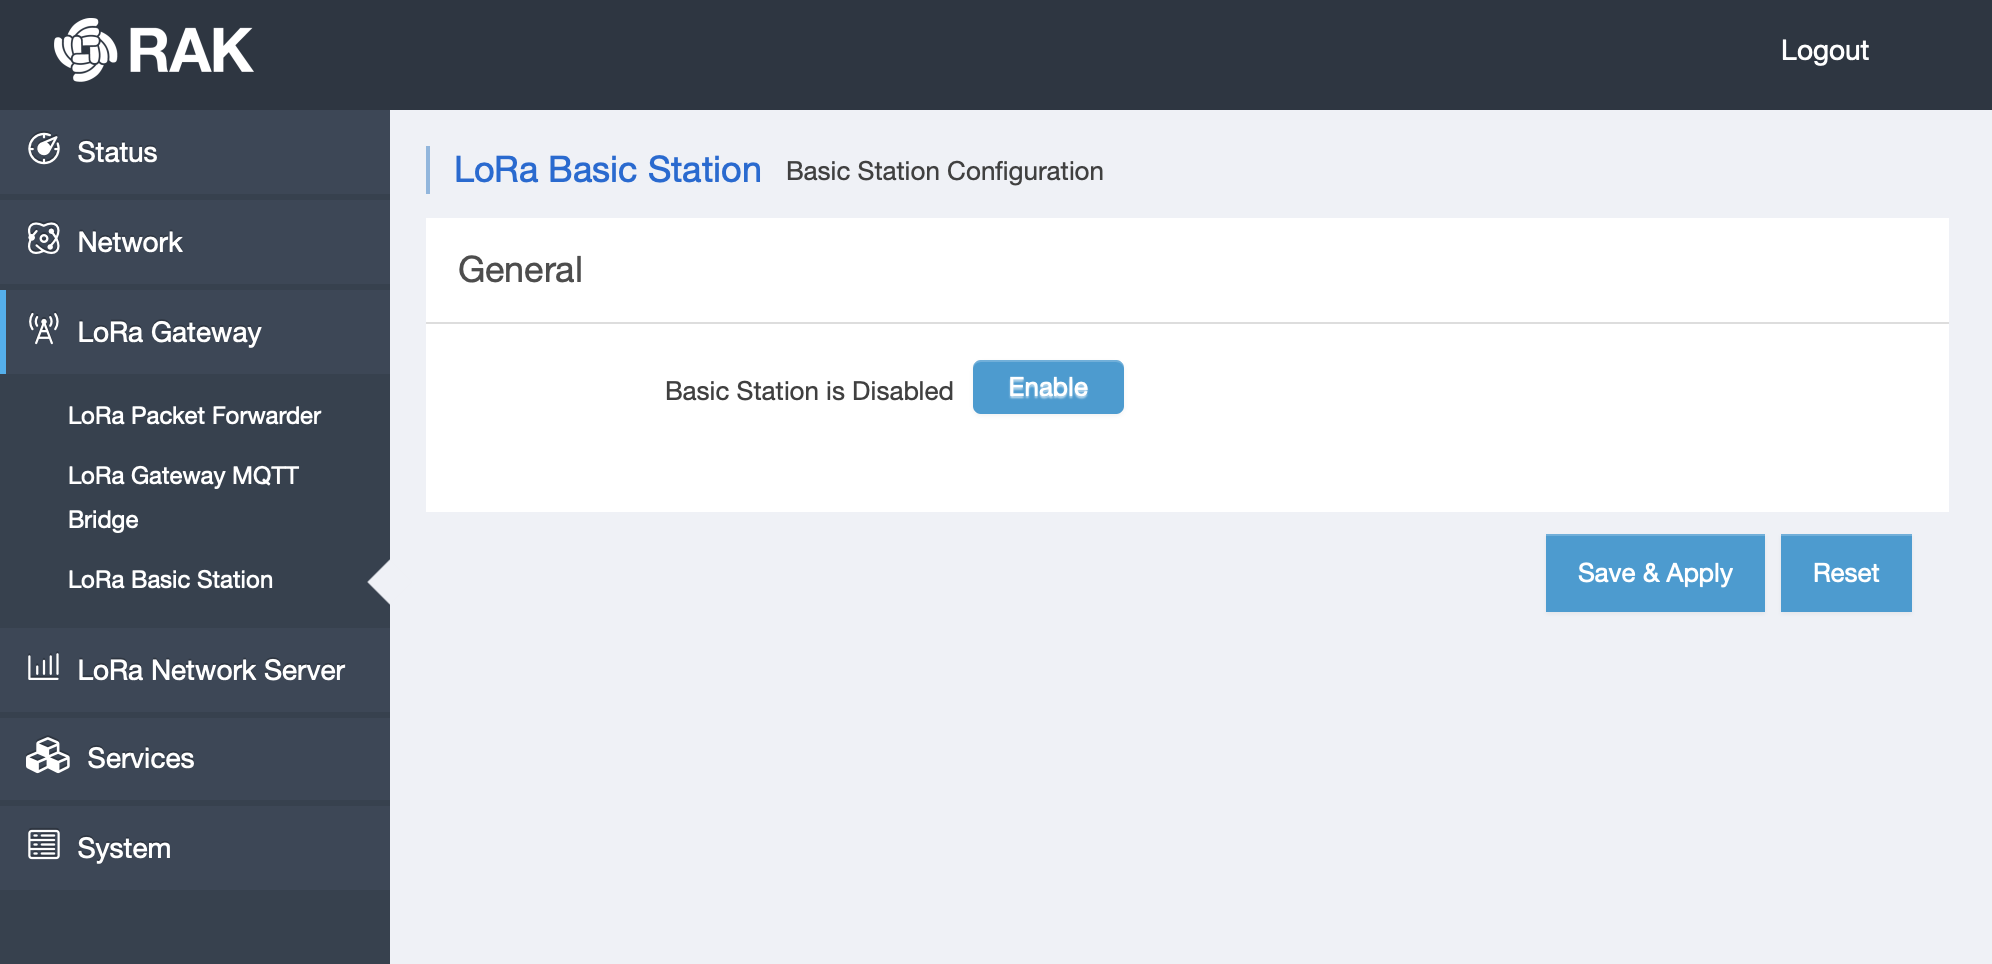
Step 1) Log into the web configuration, go to the new Basic Station tab ard press Enable

Step 2) Scrolling down go to the LNS server section

For LNS URI enter wss://lns.eu.thethings.network

(“eu” stand for Europe, replace the eu with us, in or au if you’re in the US, India or Australia respectively)

in Authentication mode select “TLS Server Authentication”

and in trust field paste the LetsEncrypt root key in BER format from https://letsencrypt.org/certs/trustid-x3-root.pem.txt

Step 3) Press Save & Apply

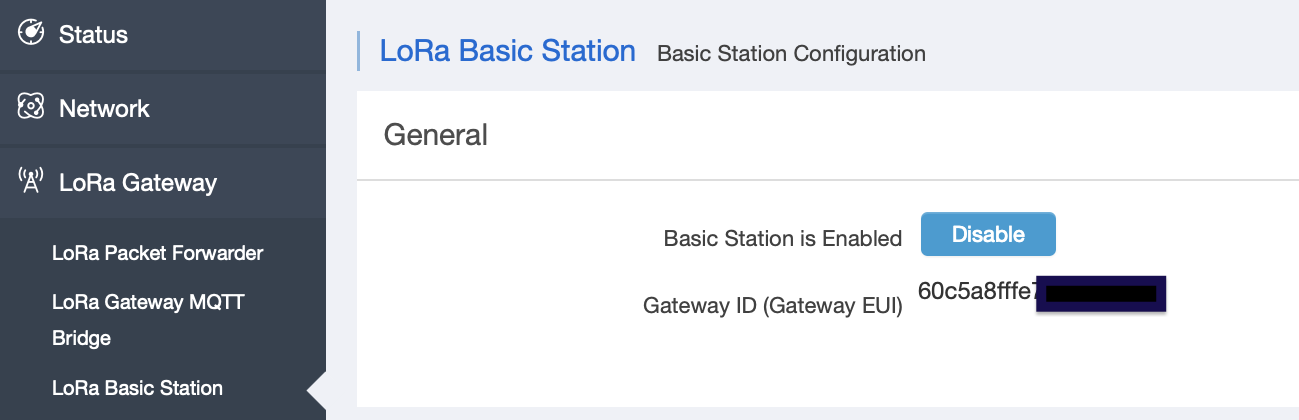
Done, you’re gateway will now connect to Things Network using the Basic Station protocol. On the Things Network end everything will be the same as with the Semtech UDP “legacy” protocol, and the gateway should have the same EUI as before.

If this is a new gateway you can simply register it on TTN using the EUI shown near the top

and on TTN remember to tick the use legacy packet forwarder box

Hope you found this guide easy but let me know if you have any questions :smile:

Let’s all move to Basic Station protocol as soon as possible and leave the old UDP protocol in the past!

3 Likes

Jose, thanks for this I’ve used Multitech Gateways for over five years.
But looking at features of RAK gateways looking very mature.

I’m hoping that future firmware releases provide GW meta data like Cell RSSI/ RSRP operator etc.
The biggest issue I’ve had on cellular backhaul is the operators this both in EU/USA.
I’m working with an African start-up this becomes even more crucial.

Nice to see white listing, ping reboot/cell modem restart you can tell the RAK guys have a background in cellular coms.

why are we checking the option

i,m using the legacy packet forwarder

when we are trying to use basic station ?

So that TTN doesn’t try to use the TTN Packet Forwarder that they stopped developing 3 years ago …

It won’t be removed from v2 console which is frozen as it is, they are working on v3 now.

When I setup Basic Station towards our self-hosted Things Stack (v3), the LoRa Packet Logger no longer registers any packets. Also, the System Log shows very little information compared to using the UDP packet forwarder. Is there something amiss here?

If packets are arriving at the network server, my guess would be that these debug aids depend on the UDP packet forwarder and would have to be substantially re-worked for a basic station case.

If packets aren’t arriving at the network server, then you have a problem.

The gateway is connected to the Network Server and is carrying traffic seen at the Network server. So I guess the LoRa Packet Logger and System Log are not useful when using Basic Station protocol.
That’s unfortunate, since the UDP forwarder has a security weakness and the “TTN” organization (at least) is pushing to upgrade to Basic_Station.
I think LoRa Alliance is planning to release a standardized interface between GW & NS in 2021. Possibly based on Basic Station?

TTI, who are developing the v3 stack are supporting both. TTN, the free network run by TTI based on the TTI v2 stack, is not seeing any push to anything.

Where did you hear that?

Thanks for your comment Nick.
“Pushing to upgrade to Basics Station” … is my perception. Some references:

“The LoRa Basics™ Station protocol simplifies management of large scale LoRaWAN networks. LoRa Basics™ Station is the preferred way of connecting Gateways to The Things Stack.”
From Things Stack documentation: https://www.thethingsindustries.com/docs/gateways/concepts/lora-basics-station/

And a good webinar video on the problems using UDP forwarder, and how Basics Station addresses those issues. Some interesting statistics also on the distribution of packet forwarder types across the TTN world.

Some vendors have a proprietary packet forwarder which can be installed on various gateway types. It seems only a matter of time before standards overtake proprietary interfaces. So was the story in mobile telephony at least. Semtech built Basics Station, so I guess they might have a significant influence at LoRa Alliance technical committee.

For the RAK Gateway usage of Basics Station, that’s good. But some usability issues may remain, e.g. as noted in first post. And, there is no radio channel allocations when using Basics Station vs. UDP. Maybe that is the role for CUPS protocol to download the correct radio configuration on connection setup.

Appreciate any comments or advice on the issues noted.

Is there any simply way to connect a RAK7258 to TTN v3 with the web-generated token?

Debug shows:

user.err basicstation[3138]: [AIO:ERRO] tc contains malformed auth token - expecting: {header: value\r\n}*
user.info basicstation[3138]: [TCE:INFO] INFOS reconnect backoff 60s (retry 9)

I have tried to force \r\n characteres at the end, and modify the TTN token by adding (from its docs):

"Authorization: Bearer $API_KEY"

But it seems that all the test does not fit into the RAK’s firmware requirements.

Thank you in advance

@jcaridadhdez I didn’t need the \r\n on the end, just pasted the key from TTN v3 and it worked. Here’s how I got my RAK7258 working with Basic Station and TTN v3:

(X) LNS Server

URI: wss://eu1.cloud.thethings.network

Port: 8887

Authentication Mode: TLS Server Authentication and Client Token

Trust: -----BEGIN CERTIFICATE-----
MIIFazCCA1OgAwIBAgIRAIIQz7DSQONZRGPgu2OCiwAwDQYJKoZIhvcNAQELBQAw
TzELMAkGA1UEBhMCVVMxKTAnBgNVBAoTIEludGVybmV0IFNlY3VyaXR5IFJlc2Vh
cmNoIEdyb3VwMRUwEwYDVQQDEwxJU1JHIFJvb3QgWDEwHhcNMTUwNjA0MTEwNDM4
WhcNMzUwNjA0MTEwNDM4WjBPMQswCQYDVQQGEwJVUzEpMCcGA1UEChMgSW50ZXJu
ZXQgU2VjdXJpdHkgUmVzZWFyY2ggR3JvdXAxFTATBgNVBAMTDElTUkcgUm9vdCBY
MTCCAiIwDQYJKoZIhvcNAQEBBQADggIPADCCAgoCggIBAK3oJHP0FDfzm54rVygc
h77ct984kIxuPOZXoHj3dcKi/vVqbvYATyjb3miGbESTtrFj/RQSa78f0uoxmyF+
0TM8ukj13Xnfs7j/EvEhmkvBioZxaUpmZmyPfjxwv60pIgbz5MDmgK7iS4+3mX6U
A5/TR5d8mUgjU+g4rk8Kb4Mu0UlXjIB0ttov0DiNewNwIRt18jA8+o+u3dpjq+sW
T8KOEUt+zwvo/7V3LvSye0rgTBIlDHCNAymg4VMk7BPZ7hm/ELNKjD+Jo2FR3qyH
B5T0Y3HsLuJvW5iB4YlcNHlsdu87kGJ55tukmi8mxdAQ4Q7e2RCOFvu396j3x+UC
B5iPNgiV5+I3lg02dZ77DnKxHZu8A/lJBdiB3QW0KtZB6awBdpUKD9jf1b0SHzUv
KBds0pjBqAlkd25HN7rOrFleaJ1/ctaJxQZBKT5ZPt0m9STJEadao0xAH0ahmbWn
OlFuhjuefXKnEgV4We0+UXgVCwOPjdAvBbI+e0ocS3MFEvzG6uBQE3xDk3SzynTn
jh8BCNAw1FtxNrQHusEwMFxIt4I7mKZ9YIqioymCzLq9gwQbooMDQaHWBfEbwrbw
qHyGO0aoSCqI3Haadr8faqU9GY/rOPNk3sgrDQoo//fb4hVC1CLQJ13hef4Y53CI
rU7m2Ys6xt0nUW7/vGT1M0NPAgMBAAGjQjBAMA4GA1UdDwEB/wQEAwIBBjAPBgNV
HRMBAf8EBTADAQH/MB0GA1UdDgQWBBR5tFnme7bl5AFzgAiIyBpY9umbbjANBgkq
hkiG9w0BAQsFAAOCAgEAVR9YqbyyqFDQDLHYGmkgJykIrGF1XIpu+ILlaS/V9lZL
ubhzEFnTIZd+50xx+7LSYK05qAvqFyFWhfFQDlnrzuBZ6brJFe+GnY+EgPbk6ZGQ
3BebYhtF8GaV0nxvwuo77x/Py9auJ/GpsMiu/X1+mvoiBOv/2X/qkSsisRcOj/KK
NFtY2PwByVS5uCbMiogziUwthDyC3+6WVwW6LLv3xLfHTjuCvjHIInNzktHCgKQ5
ORAzI4JMPJ+GslWYHb4phowim57iaztXOoJwTdwJx4nLCgdNbOhdjsnvzqvHu7Ur
TkXWStAmzOVyyghqpZXjFaH3pO3JLF+l+/+sKAIuvtd7u+Nxe5AW0wdeRlN8NwdC
jNPElpzVmbUq4JUagEiuTDkHzsxHpFKVK7q4+63SM1N95R1NbdWhscdCb+ZAJzVc
oyi3B43njTOQ5yOf+1CceWxG1bQVs5ZufpsMljq4Ui0/1lvh+wjChP4kqKOJ2qxq
4RgqsahDYVvTH9w7jXbyLeiNdd8XM2w9U/t7y0Ff/9yi0GE44Za4rF2LN9d11TPA
mRGunUHBcnWEvgJBQl9nJEiU0Zsnvgc/ubhPgXRR4Xq37Z0j4r7g1SgEEzwxA57d
emyPxgcYxn/eR44/KJ4EBs+lVDR3veyJm+kXQ99b21/+jh5Xos1AnX5iItreGCc=
-----END CERTIFICATE-----

(I got the certificate here - https://letsencrypt.org/certs/isrgrootx1.pem.txt)

Token: Authorization: Bearer [LNS_API_KEY]

To create your LNS_API_KEY, in the TTN v3 console goto Gateways and API Keys and click the + Add API key button.
Enter a Name like “LNSkey”, select Grant individual rights, select Link as Gateway to a Gateway Server for traffic exchange, i.e. write uplink and read downlink, click the Create API key button. Copy the key and paste it after the text "Authorization: Bearer " in the Token box so it looks like: Authorization: Bearer NNSXS…

2 Likes