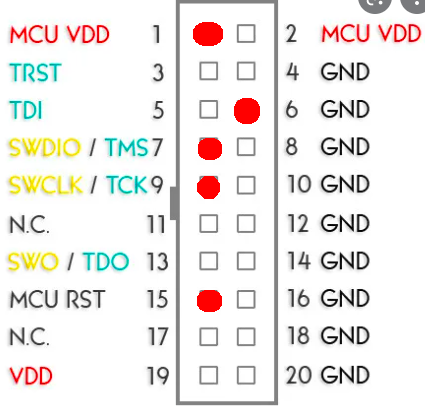
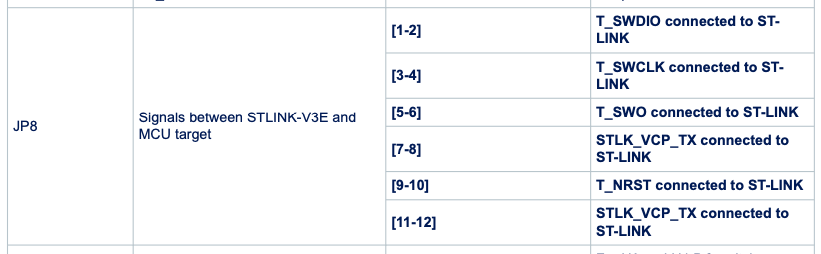
I am not sure how you can use the on-board ST-LINK of STM32WL DK since it doesn’t have the MCU Reset pin for Hardware Reset mode. It only has T_NRST which is used for JTAG.
I have experience before that STM32CubeProgrammer can’t detect the chip using STLINK. But when I used STM32CubeIDE, it can successfully debug and run projects using the same STLINK and connections.
It seems that the STM32CubeIDE has its own STM32CubeProgrammer in it.
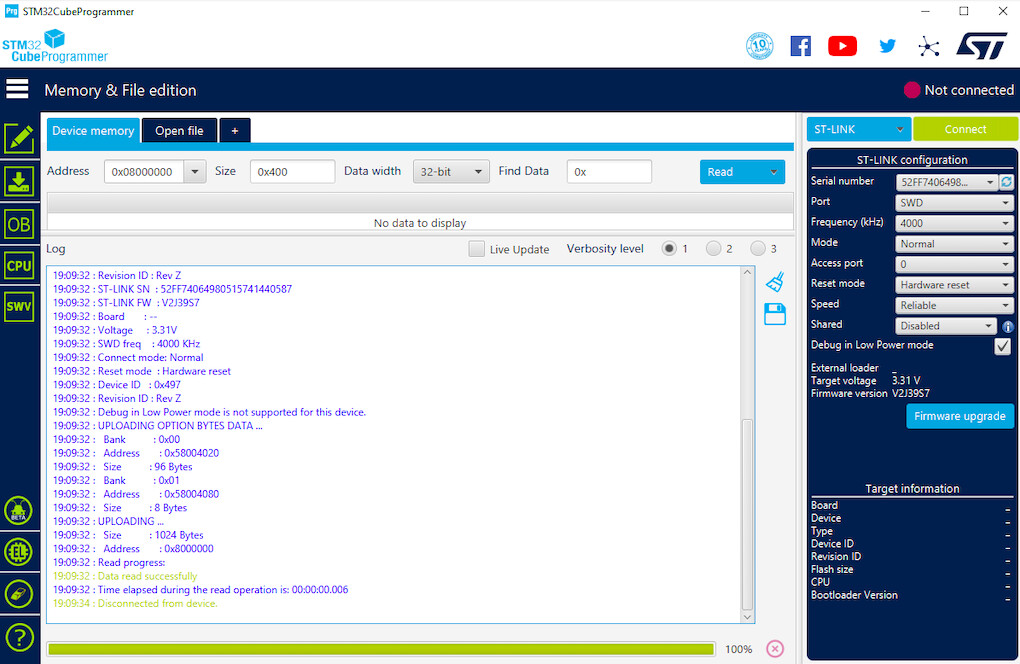
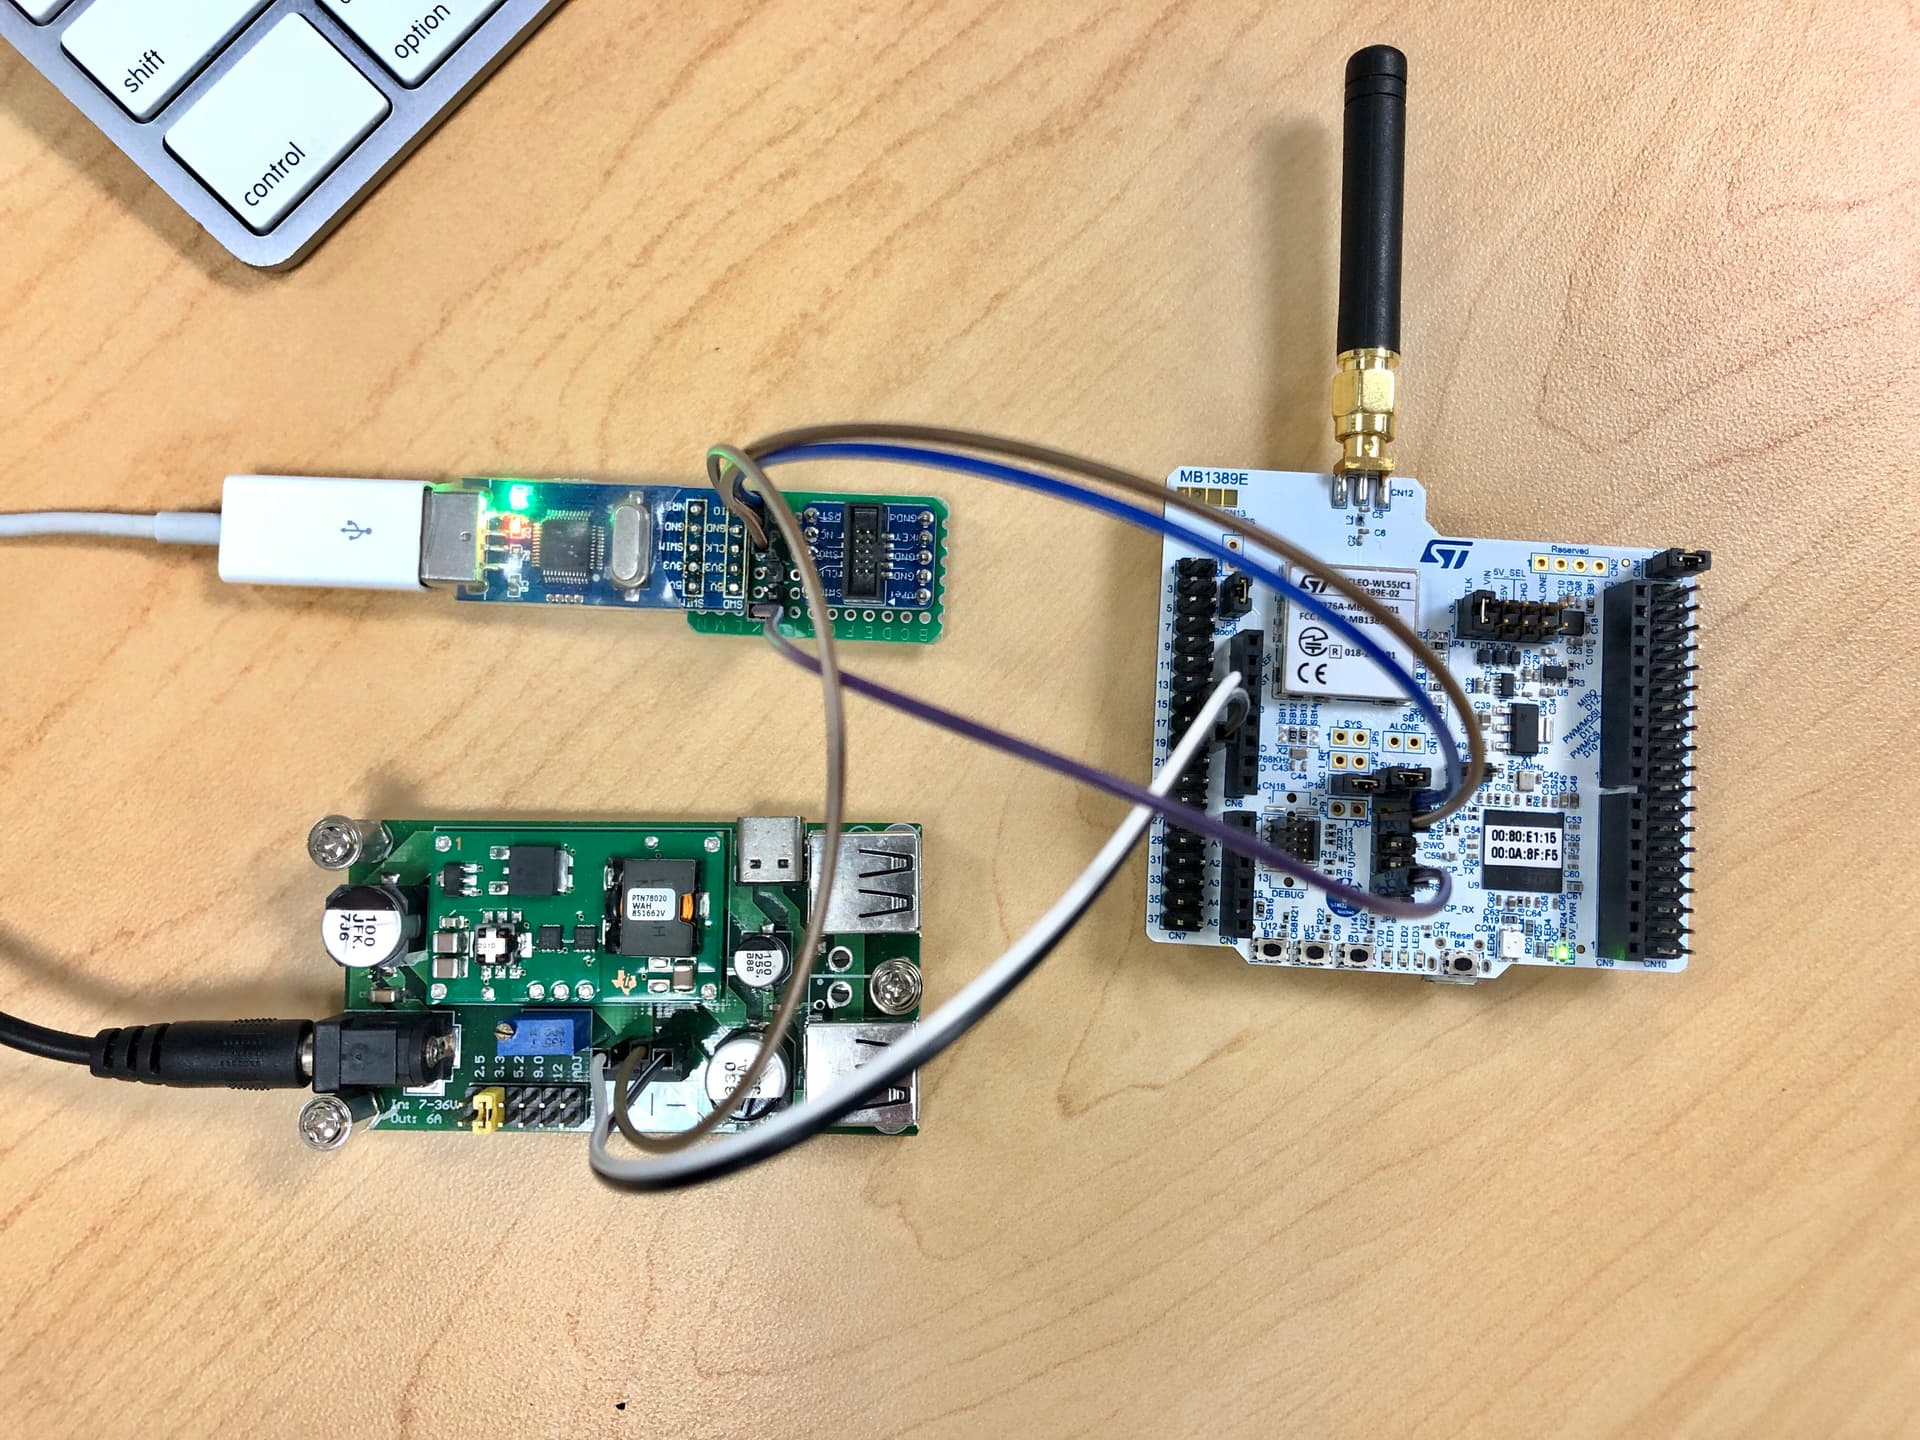
Thank you so much for the support. I tried again using ST-Link-V2 connected to WL55 SoC. I have a NRST pin on my ST-Link-V2, and I can read the MCU only when NRST is connected to the SoC’s RST. So I think T_NRST and MCU_RST are the same. The connection and the result for my ST-Link-V2 and the SoC with external power supply are showed below.
For RAK3172, I did exactly what you said using the same connection, but still no target MCU detected. When I try to do full chip erase using UART, it showed error and said to check for chip protection (this doesn’t happen with WL55 SoC using UART boot mode). But I couldn’t read any useful information using UART. I think something is wrong with the boot memory. I’m looking for STM32WL5CCU6 for swapping out the IC but it’s out of stock everywhere. I’m wondering if RAK has any RAK3172 modules without flashing the firmware in stock. I would like to purchase them right away.
What’s interesting about the bootloader verification issue is that the verify error seems to occur at the start the last flash page aka sector being written.
Your program was 50320 bytes long, which requires 25 2K pages or sectors. And the tool claims it erased sectors 0 through 24, hopefully inclusive.
But the error comes at the first word of sector 24.
If through some logic error (< vs <=), actually only 24 sectors (0 through 23) were being erased that would explain it exactly.
Can you concatenate 2K of arbitrary padding onto the end of your bin file and see if you push the verify error beyond 0x0800c490 such that your entire actual program gets loaded?
It’s not entirely clear to me if you’re dealing with ST’s ROM bootloader (most likely if your application can start at the start of physical flash) or a RAK bootloader, and if the tool you are using is ST’s or RAKs. I believe there are a variety of open source 3rd party tools that can drive the ST bootloader.
Have you tried configuring the reset mode to Hardware Reset and MCU RST connected? (I am not sure if your ST LINK has that pin). TRST (pin3) seems not to work. I also tried testing it with my STM32WL DK here.
Thanks @cstratton. Yes, you are right. I fixed that error yesterday by manually erasing the whole memory sector by sector. From that I have been able to flash the MCU and verify the program successfully. That proves the MCU does works using UART boot mode. However, I’m trying to figure out how to debug the MCU using ST-Link which is totally different from UART boot mode.
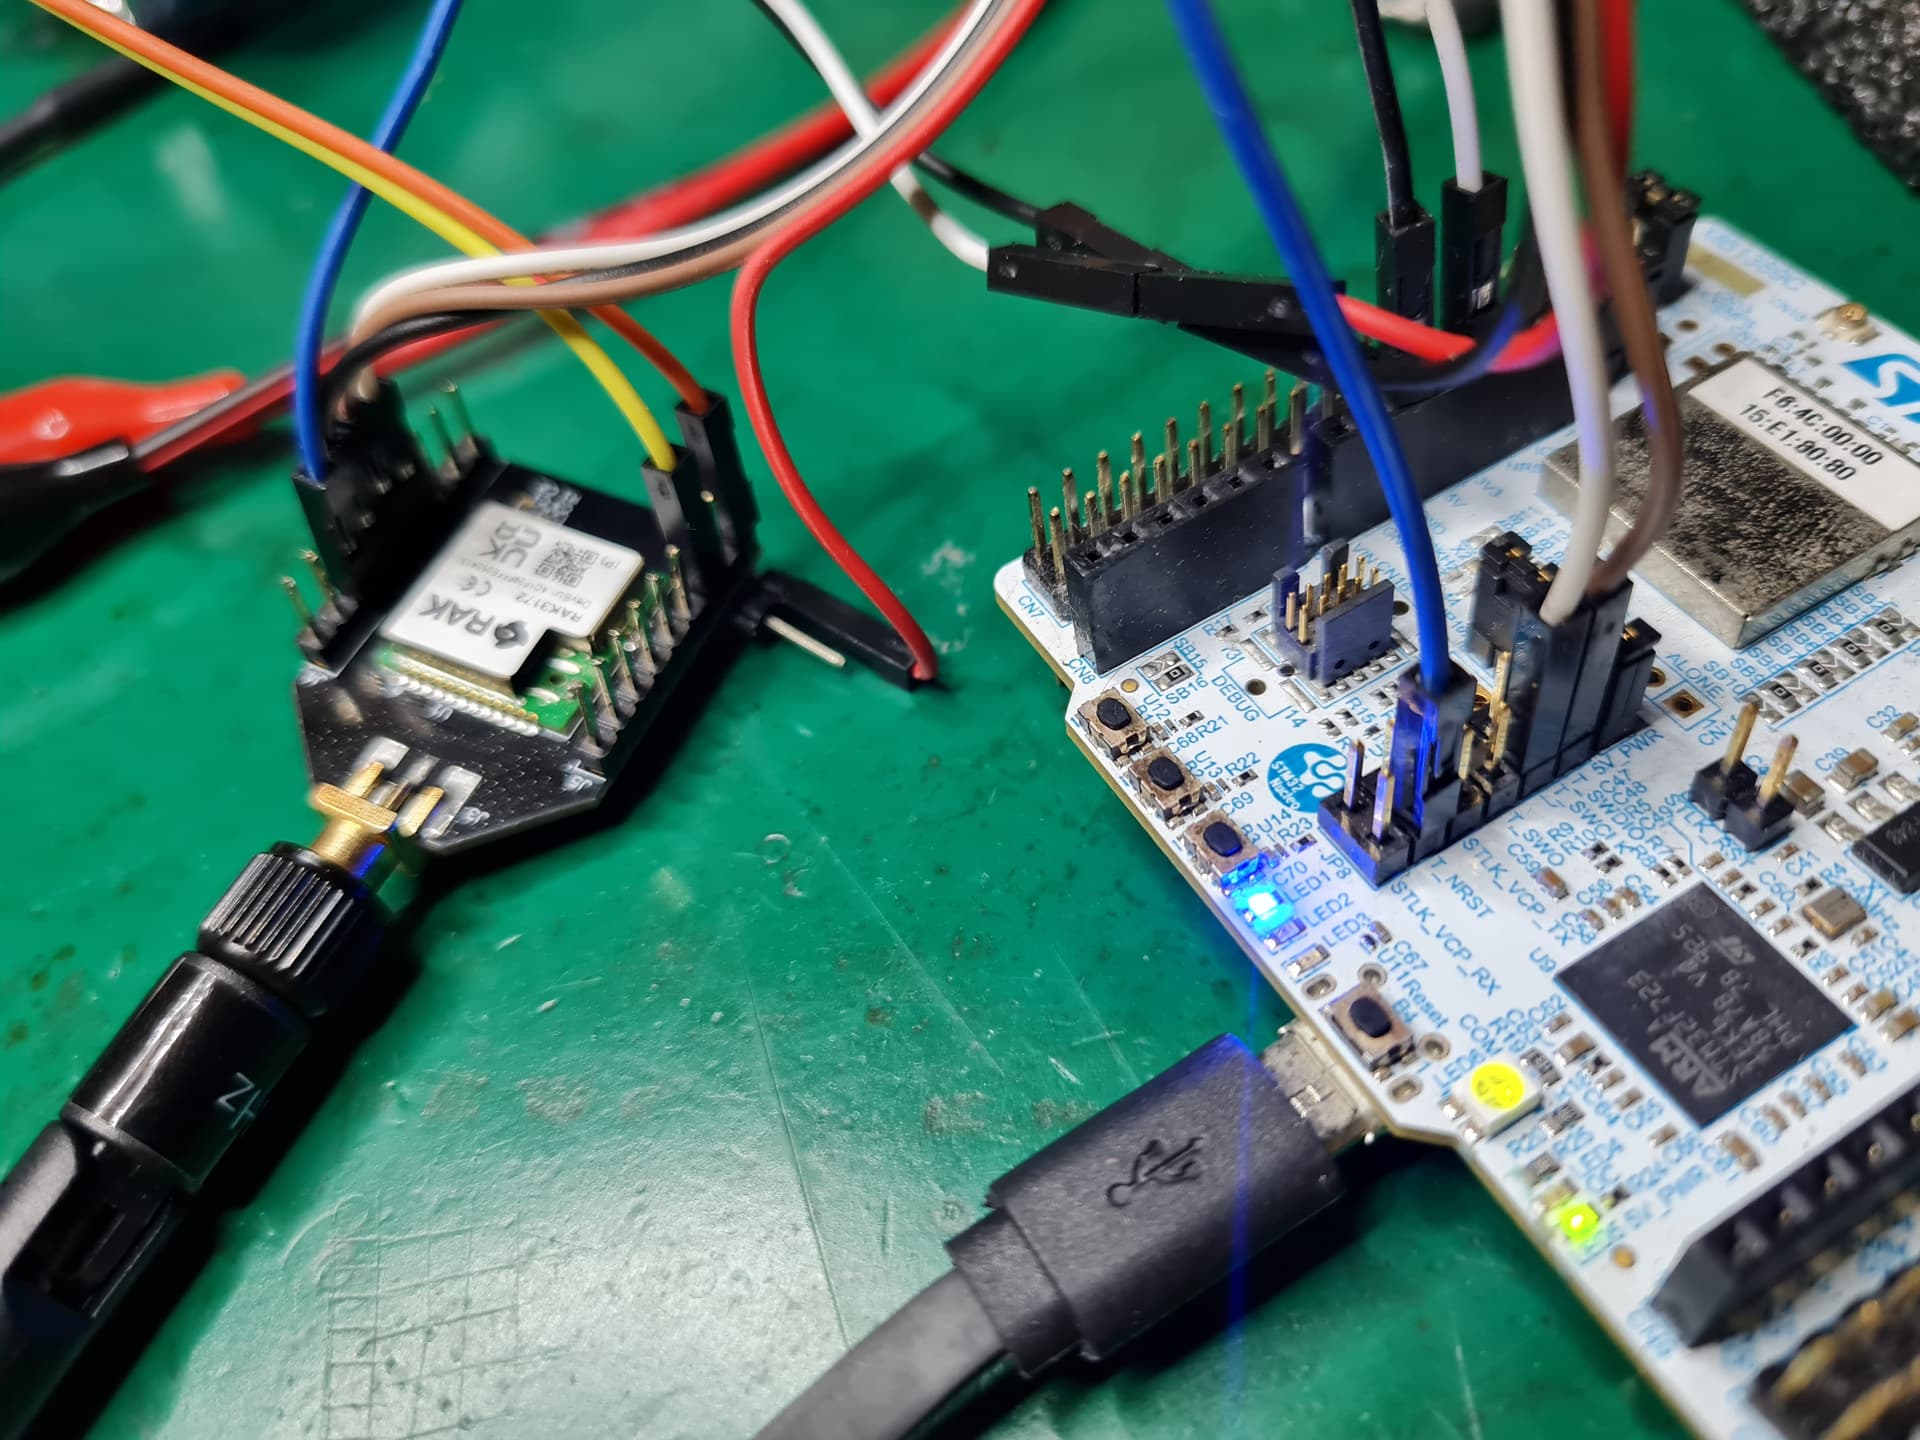
Hi @carlrowan, my ST-Link-V2 was connected to RAK3172 with BOOT0 to GND, NRST connected, external 3.3V power supply with common ground, SWCLK and SWDIO connected. I tried all possible configurations on STM32CubeProgrammer as you have mentioned. All of them worked for WL55 SoC but nothing seems to work with RAK3172. I don’t think there is anything else I could do. Thank you so much for your help!
I am getting out of ideas here. Hmm. What IDE are you using? Does it support STLINK integration? If it does, can you try if you can debug there? I had experience before that I can connect my STLINK to the STM32CubeIDE but can’t connect to STM32CubeProgrammer.
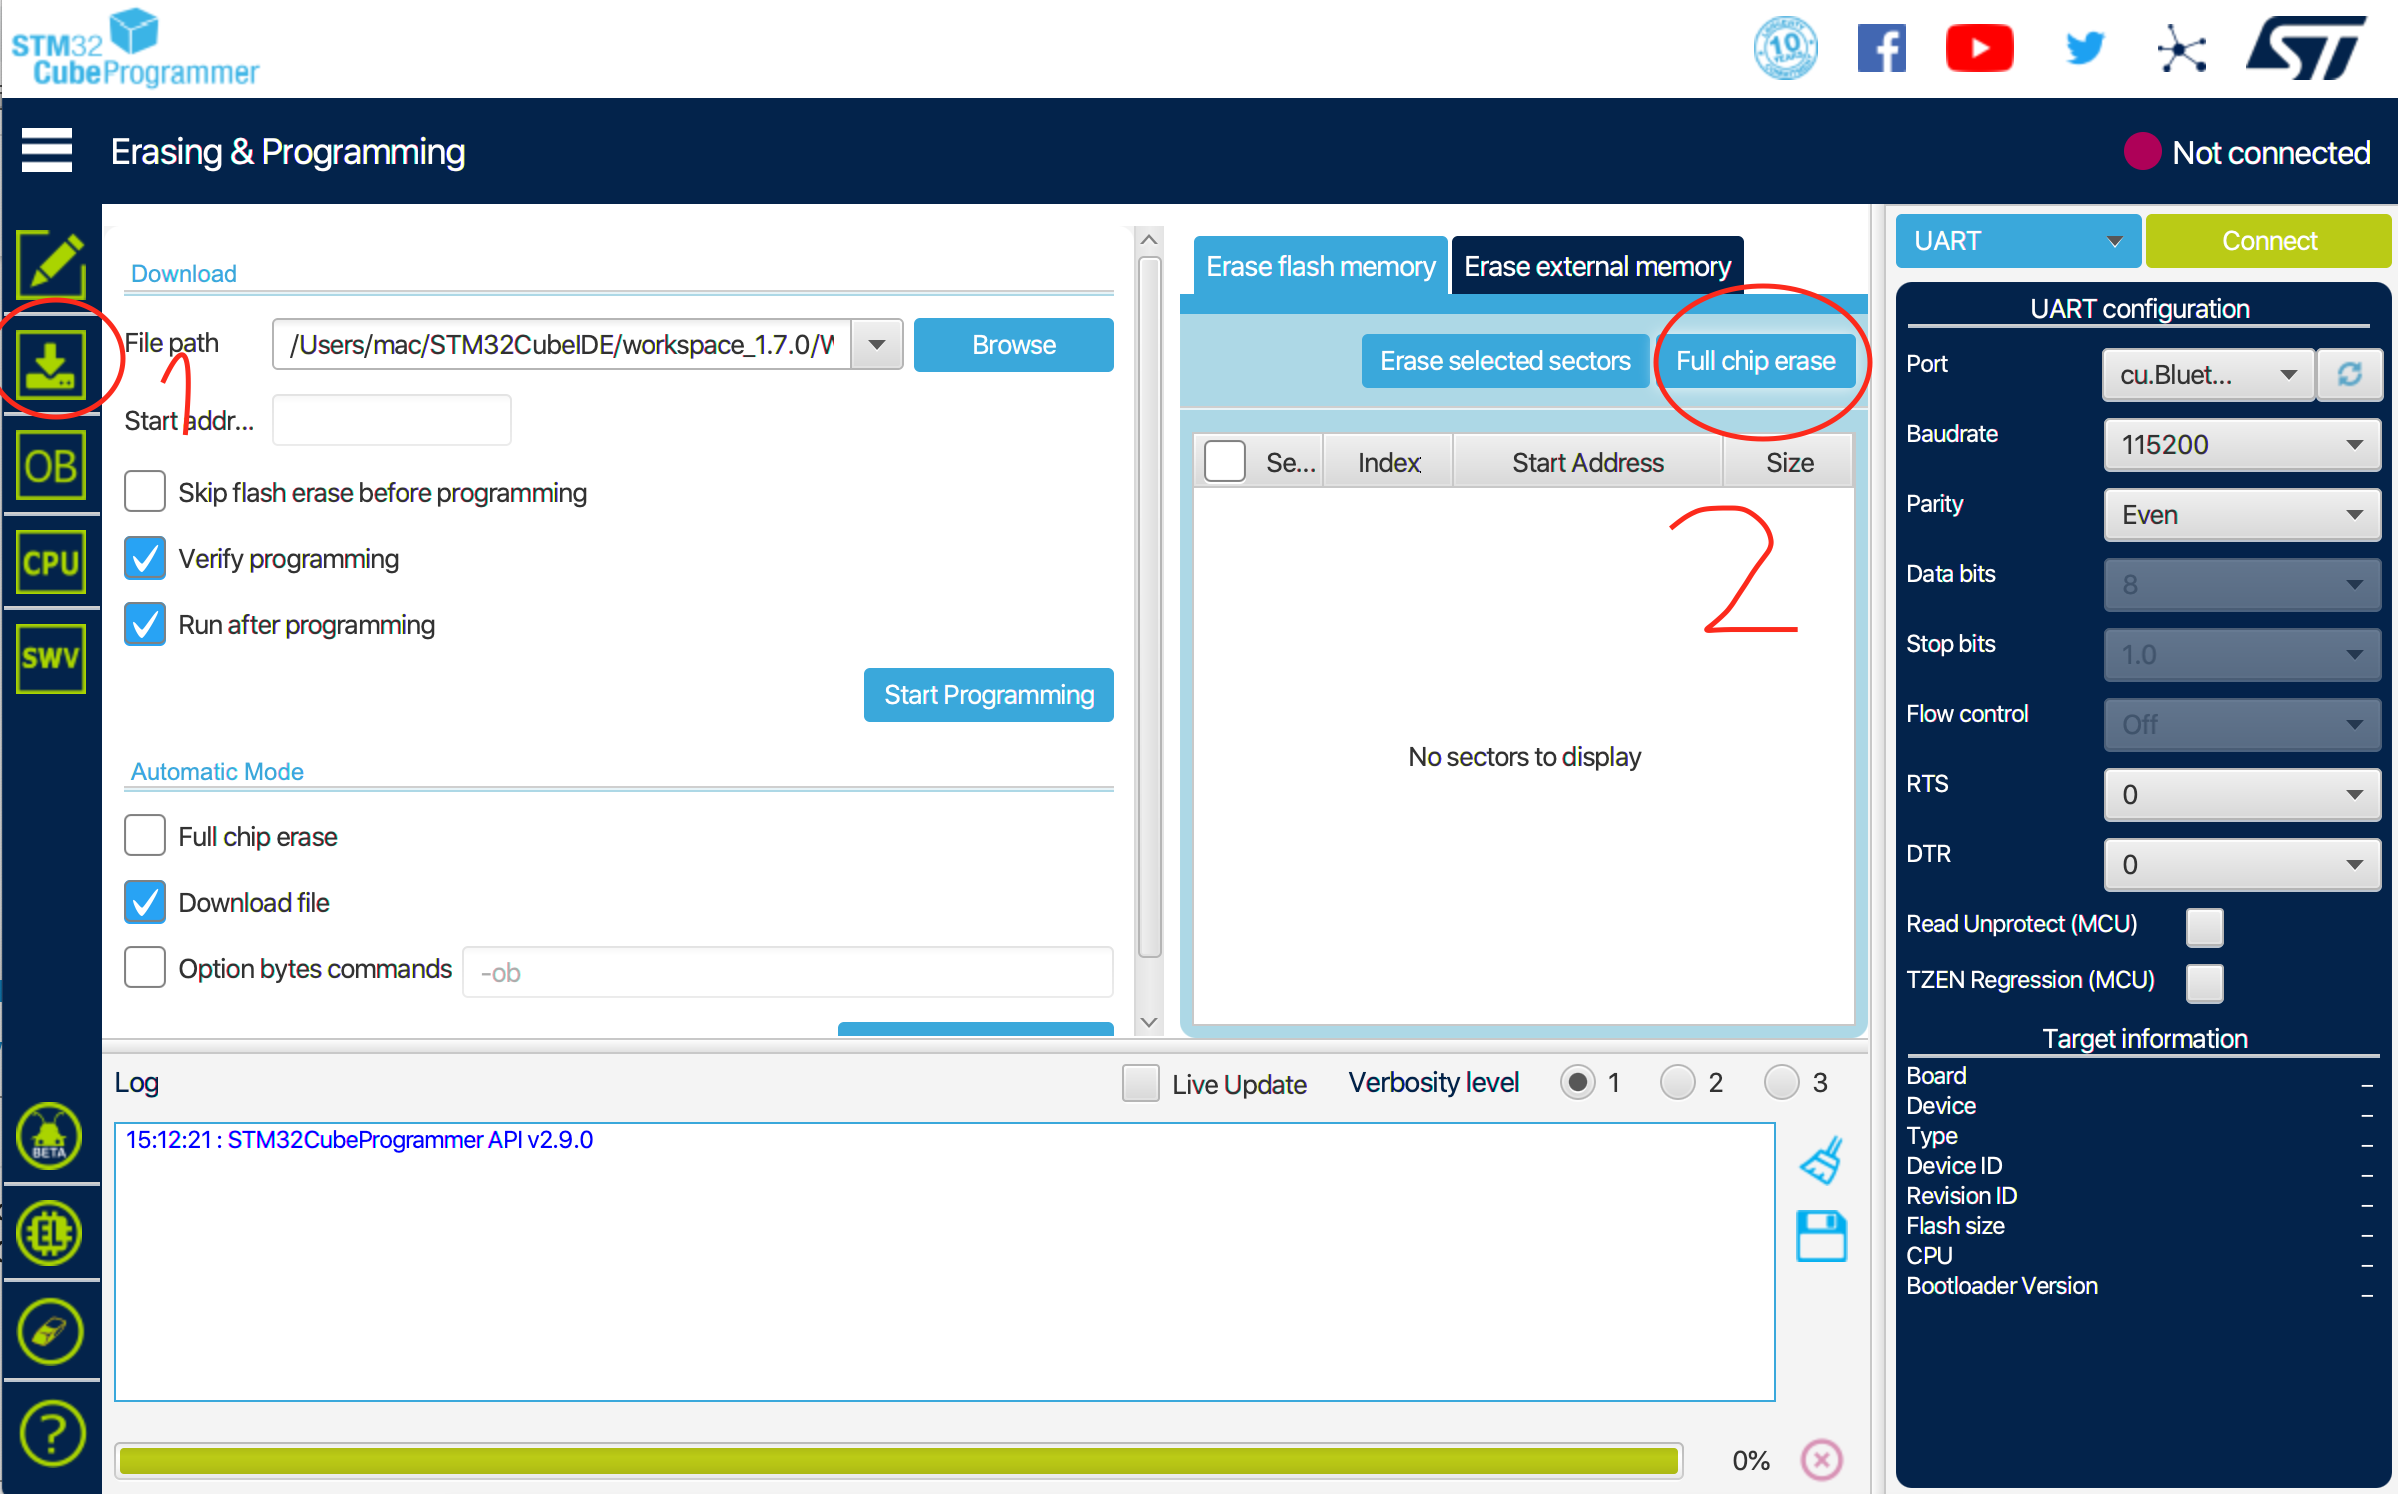
Thank you! I tested the module using STM32CubeIDE and it does not find any target MCU. Could you please try to perform full chip erase for RAK3172 using UART boot mode? If it does not show up any errors, then that means my RAK modules have a problem. I did that with my WL55 SoC and it was done smoothly. Otherwise, I will purchase ST-Link V2 from digikey and test the module again.
Thank you for the help. I can perform full erase for RAK3172 via UART using lower version of STM32CubeProgrammer. Meanwhile, I tried with my new ST-Link-V2 from digikey using all combinations with similar configuration and software/firmware version as you did. It worked with my WL55 SoC but still doesn’t work for my two RAK3172 modules.
I tried again with 5-pin JTAG connected to a new RAK3172, and modified debug configuration in the IDE (confirmed external 3.3V power supply from WL55 DK), but I still get the same error. Anyway, thank you so much for the support!
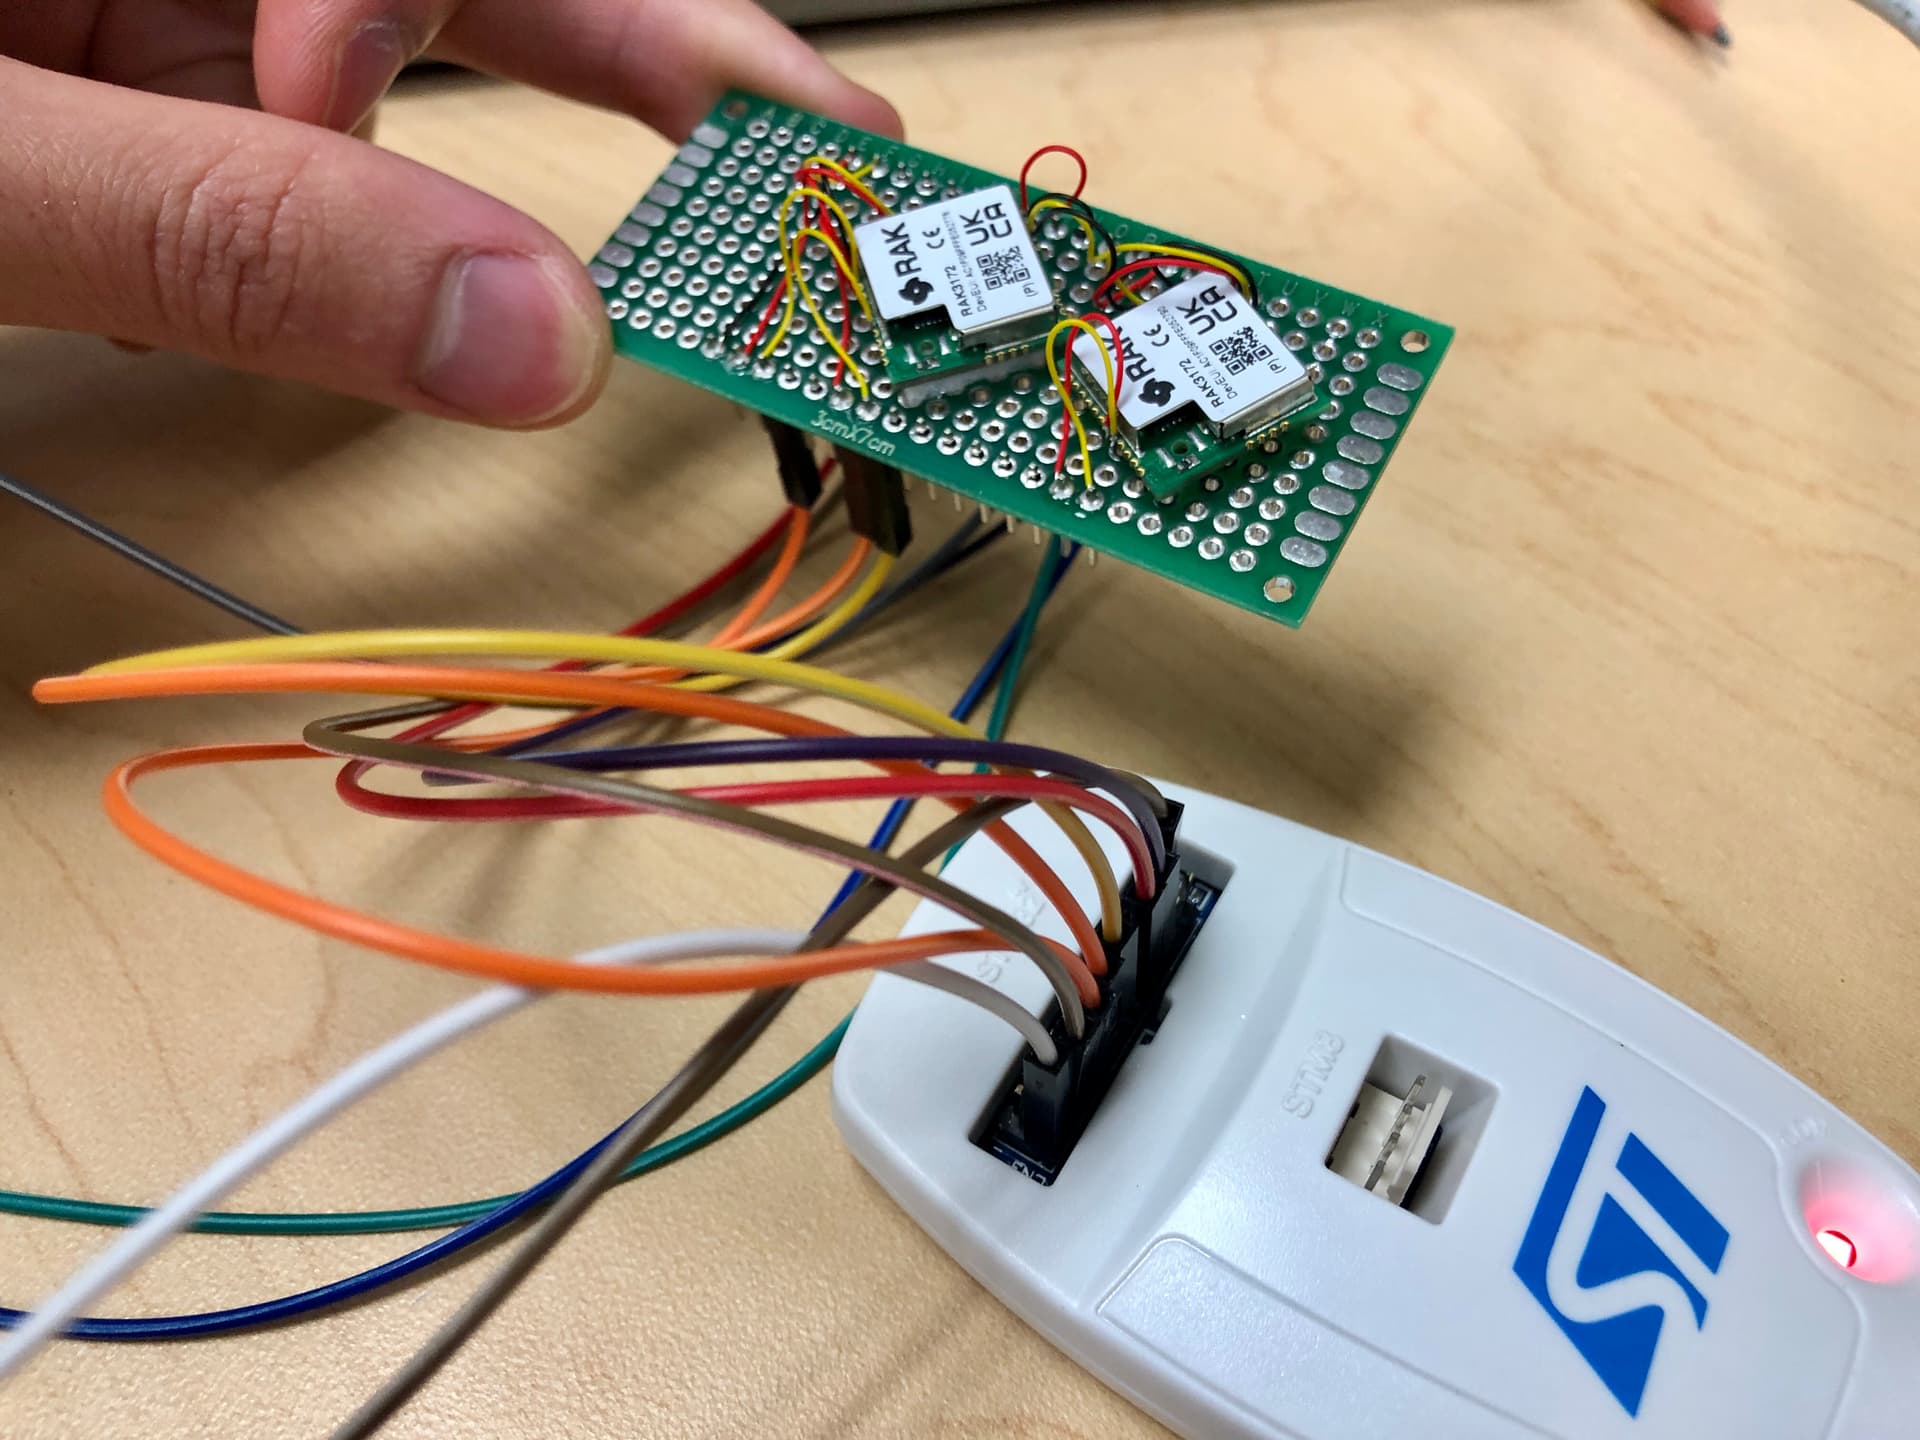
Thank you so much @carlrowan ! The module will not work with ST-Link V2 without the reset circuit in this diagram. In short, to flash RAK3172 using ST-Link V2:
Boot0 must be connected to the ground.
NRST must be connected to the debugger (sometime it still works without this connection).
The reset circuit is critical.
Power, SWDIO, SWCLK are connected.
I also tested the module with ST-Link V3 in WL55 DK but it doesn’t work.
This is not required, SWD should be operational in either flash or system ROM (bootloader) mode. However, forcing it to system ROM mode can be a way to work around a program in flash (intentional or corruption) that disables the SWD
NRST must be connected to the debugger (sometime it still works without this connection).
The reset circuit is critical.
This is not required unless what is in flash would disable SWD. I’ve seen this happen somewhat randomly with a wide variety of STM32’s even when there’s no attempt to load a program that intentionally repurposes the SWD pins as GPIO (or UART or whatever). So it’s useful to know how to fix such a situation, but 95% of the time a flashing setup only needs ground, SWD, SWCLK, and a target voltage reference if the adapter is a real one that doesn’t make assumptions.
I also tested the module with ST-Link V3 in WL55 DK but it doesn’t work.
It will if the connections are made correctly
Anyway, glad you found something that worked for you, just pointing out that what you are experience are local quirks, not general needs.
It is good to hear it is working now @hienvu . Boot0 is internally pulled to ground so no need to do it. The reset is important if you select hardware_reset.