Hello I use RAK11720 , I get error Arduino IDE 1.8.19
AT commands work but I cannot install software
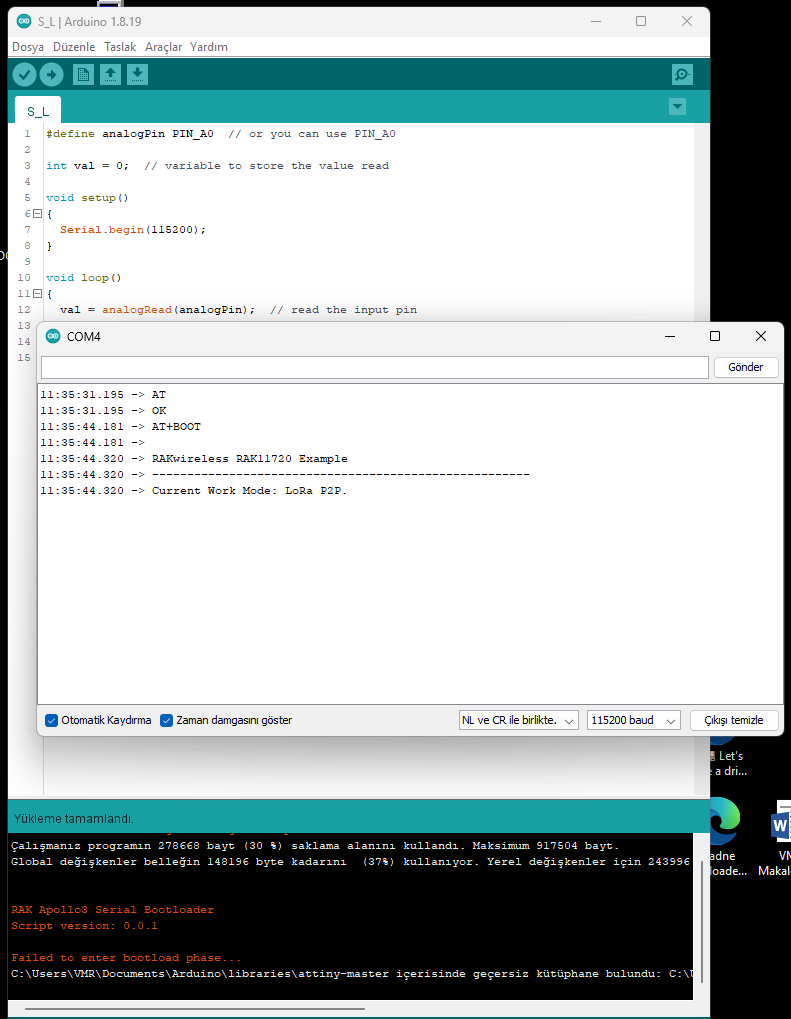
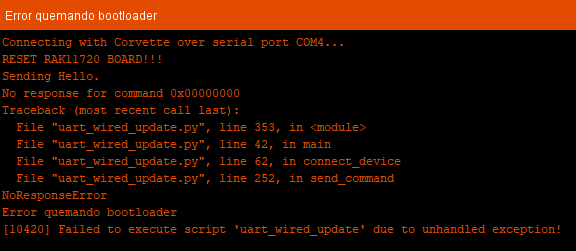
RAK Apollo3 Serial Bootloader
Script version: 0.0.1
Failed to enter bootload phase…

Hello I use RAK11720 , I get error Arduino IDE 1.8.19
AT commands work but I cannot install software
RAK Apollo3 Serial Bootloader
Script version: 0.0.1
Failed to enter bootload phase…
Try to send
AT+BOOT
To the device before you start installing the software.
Your screenshot looks like the RAK11720 doesn’t enter bootloader mode.
How does your loop() code look like?
#define analogPin PIN_A0 // or you can use PIN_A0
int val = 0; // variable to store the value read
void setup()
{
Serial.begin(115200);
}
void loop()
{
val = analogRead(analogPin); // read the input pin
Serial.println(val); // debug value
}
Your code is literally killing the serial port.
You are sending data without any delay, the AT+BOOT message that is sent by ArduinoIDE to enter Bootloader mode has no chance to get through.
You should have
a) a delay(5000); in your setup(), so that if your code goes crazy, you have the chance to send AT+BOOT manually
b) put some delay(500) in your loop(), so that incoming data (like AT+BOOT) has a chance to arrive and be processed.
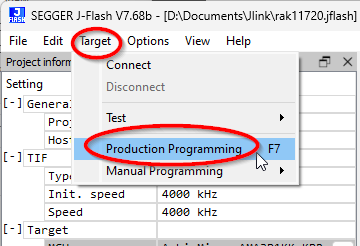
From this point, you can
a) try to send AT+BOOT immediately after releasing reset, hoping it gets through before you loop() kills all communication
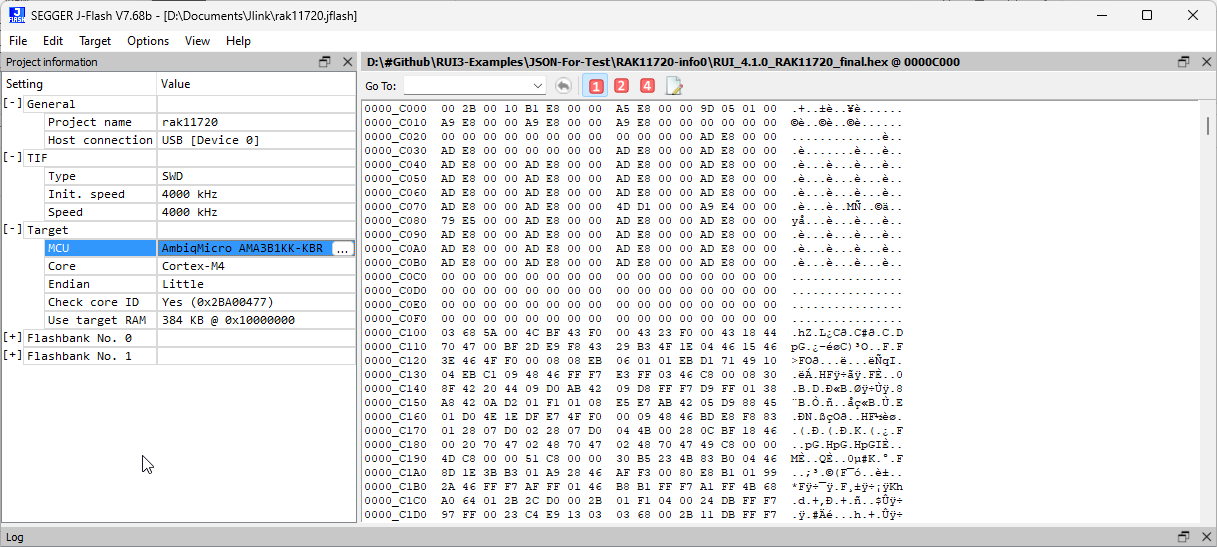
b) use a JLink adapter and flash the original RUI3 firmware. After that you should be able to flash a custom firmware again.
Hi @beegee, been awhile, hope you are well.
I hit a situation like this and now can’t upload code to my apollo3 module. Can you please direct me as to where to download the “original RUI3 firmware” to re-flash via J-Link?
Thanks!
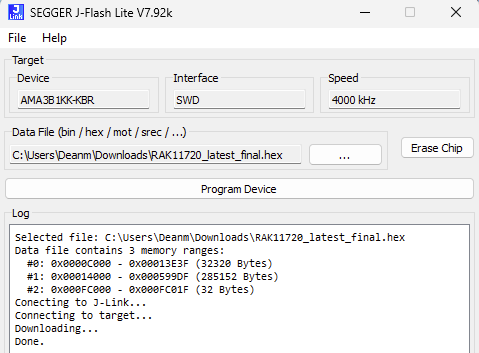
Sorry, @beegee I spoke too soon. I now have my J-link setup and have the .hex file in hand, however do you have any documentation that shows the command to use to upload the hex file with J-link?
Ah apologies again - figured it out.
Used these settings to restore functionality:
Get same problem “Failed to enter bootload phase…” on both of my two RAK11720.
As I see, You solved it. Could you explain the process?
I only have the RAKDAP device, should I get an specific programmer?
Why this problem occurs, any idea? just to keep in mind what not to do next time…
Thanks in advance
hello @Deanasaur and @ERA
This might be a double problem I experienced before as well.
(1) For flashing the firmware with JLink, I use this settings in JLink:
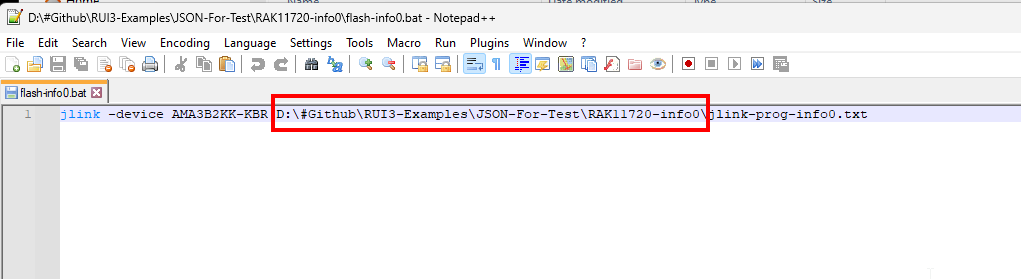
(2) If the upload still fails, you need to do a little trick.
(a) unzip the files from the attached ZIP into a folder
RAK11720-info0.zip (1.1 KB)
(b) edit the file flash-info0.bat and change the path of jlink-prog-info0.txt to the path where you copied the files to
(c) open a CLI in the folder you copied all files and run the flash-info0.bat script.
For this to work, JLink.exe has to be in your path settings.
@ERA
I have no solution for RAKDAP1.
It seems pyocd has problems to connect to the RAK11720. It never worked for me.
Sorry to bother again.
Wich jlink device should I buy and how you conect it to the Rak stamp?
I am using this one ==> https://www.segger.com/products/debug-probes/j-link/
But there are many variants available, including cheaper ones for students.
Connection to the RAK stamp module is through the SWD interface, same as with RAKDAP1.
Did you try the recovery mode
Sorry I didn’t get that last…
For programming with RAKDAP1 in Arduino IDE I use UART0 (not SWD), it worked for me last week, until suddenly I get the error message (I have been uploading code until that moment with no problems).
I have tried recovery mode, and this is the result:
Did you push the reset button when the log says RESET RAK11720 BOARD!!!
When this is shown, you have to push the reset button to continue.
Yes, in the exact moment it’s shown I push reset (to ground), and also tried to just push once and keep it pushed. During all the process BOOT/SWO is connected to 3V3.
none worked
If that doesn’t work, then the only method I know is what I showed a few post ago with JLink.
Hello Beegee.
I was stuck with the same exact problem. I was trying to program rak11720 with pyocd and a compatible CMSIS-DAP probe. It turns out that after adding this parameter -Oreset_type=sw_emulated, it allowed me to flash it as normal. I almost gave up, but that is the solution for me
Welcome to the forum @EdisonAgudelo
And thank you for sharing this information. I will give it a try.