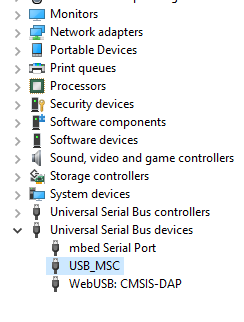
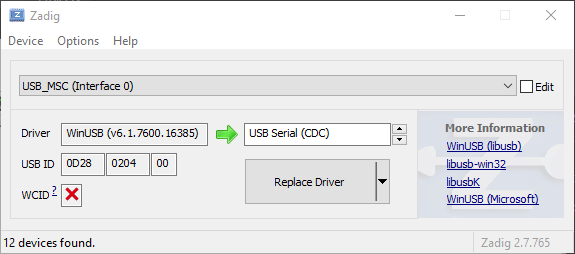
So, I went ahead and fired up zadig and updated the driver for USB_MSC (Interface 0). I elected to swap out the driver for the USB Serial (CDC) driver:
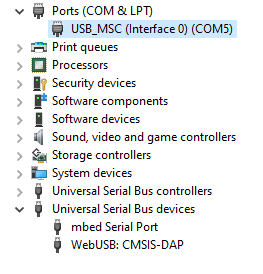
which resulted in the following changes to Device Manager
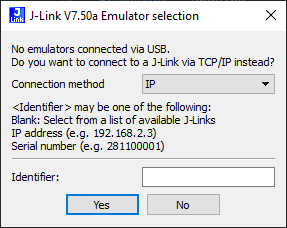
PlatformIO can now see the COM port when DAP1 is plugged in, however, I get the following dialog because (I think) there is only a single port exposed
Obviously I’ve missed something, but what could it be … ?
and just to be clear (and to prove to some that I’m a bit of a jerk) … I never use the Aruino IDE -although the latest version is most certainly an improvement, it’s still not anywhere close to what I would consider a professional development tool
Drag and drop requires that the programmer firmware have built in awareness of the programming algorithm of the target MCU - it’s something typically seen on MBED-style evaluation boards where there’s a debug adapter on the same PCB as the target processor. It wouldn’t make as much sense on a stand-alone adapter, as it would then have to get flashed with a firmware unique to the target board it was going to be used with.
But even without an adapter firmware tuned to the target MCU, it should be possible to use the CMSIS-DAP capability to program just about any SWD compatible MCU using pyocd or openocd - in that case the adapter just wiggles signals, and it’s the program on the PC that has the knowledge of how to program a particular MCU. The same goes for implementing the gdbserver protocol to allow breakpoint debugging - with CMSIS-DAP the processor-specific knowledge in in pycod or openocd, rather than the adapter firmware.
One should also be able to use an STLINK with a RAK4631 - even though the Nordic chips are different from ST’s they’re well enough behaved SWD targets that they’re compatible with the more automated “high level” protocol implemented by the STLINK when used with openocd or pyocd. Some other chips (Cypress for example) are too weird to work with anything but their own programmers or a low level solution like CMSIS-DAP that gives PC software maximum flexibility to dictate needed odd details.
@cstratton
Thanks for this explanation, to be honest,I use the RAKDAP1 only for flashing with pyOCD and as UART-USB adapter for our WisDuo modules.
But our explanation makes complete sense.
For the RAK4631, if you double push the reset button, it will appear as a USB drive and you can drag UF2 files on it to flash them.
But you have to create the UF2 files first from the hex files that the IDE generates. I think Adafruit has a guide somewhere in Github.
@beegee can you expand on using the RAKDAP1 as a UART-USB adapter, I am having some issues with it on this thread here about the RAK2270 sticker trackers.
There is not much to say about RAKDAP1 as UART/USB adapter.
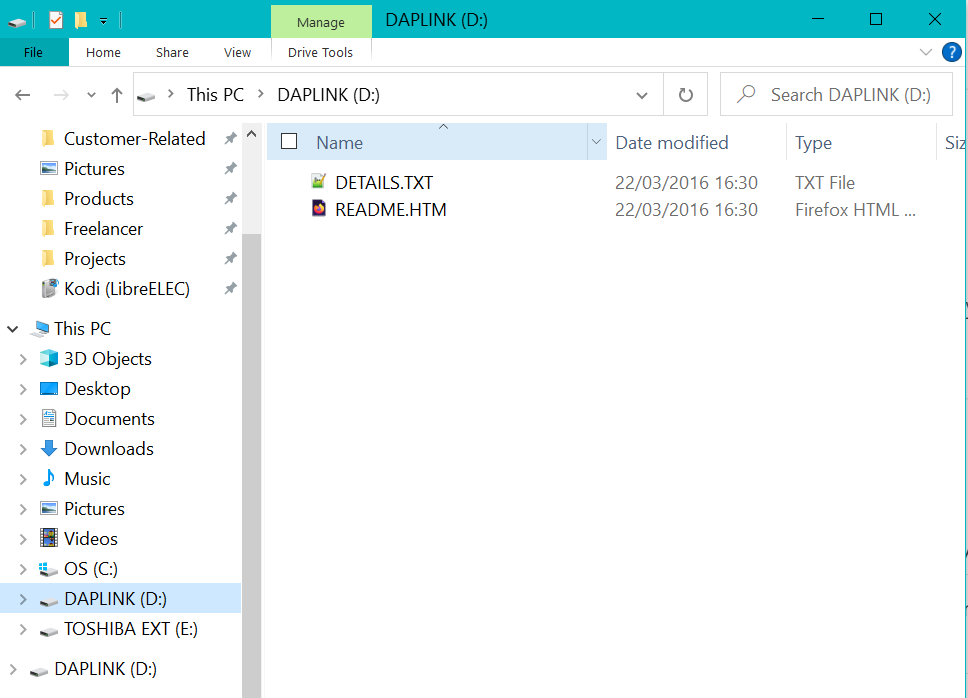
When you plug the RAKDAP1 into your computer it shows up as an external drive and as a COM port.
The connection is simple:
RAKDAP1
RAK2270
U_TX
RX
U_RX
TX
GND
GND
3V3
VCC (only connect if you power the RAK2270 from the RAKDAP1)
Then use terminal app on the COM port of the RAKDAP1, setup baudrate and make sure the AT commands are terminated with \r\n