I found a hidden gem, created by our RAKwireless Xose, to use the RAK10701 Field Tester with Chirpstack (v3 and v4), TTN and eventually as well with other LoRaWAN servers.
![]() WARNING
WARNING
Below guide is tested only by me so far using Chirpstack V4 server!
Using the RAK10701 with Chirpstack and NodeRED as backend server
A simple way to create a backend server to be used with the RAK10701 Field Tester.
One of our collegues created a NodeRED node, that can be used as a backend for the RAK10701 for servers like Chirpstack, TTN and others.
This node is able to parse received data and gateway information from the LoRaWAN server and create the downlink data for the RAK10701 to display
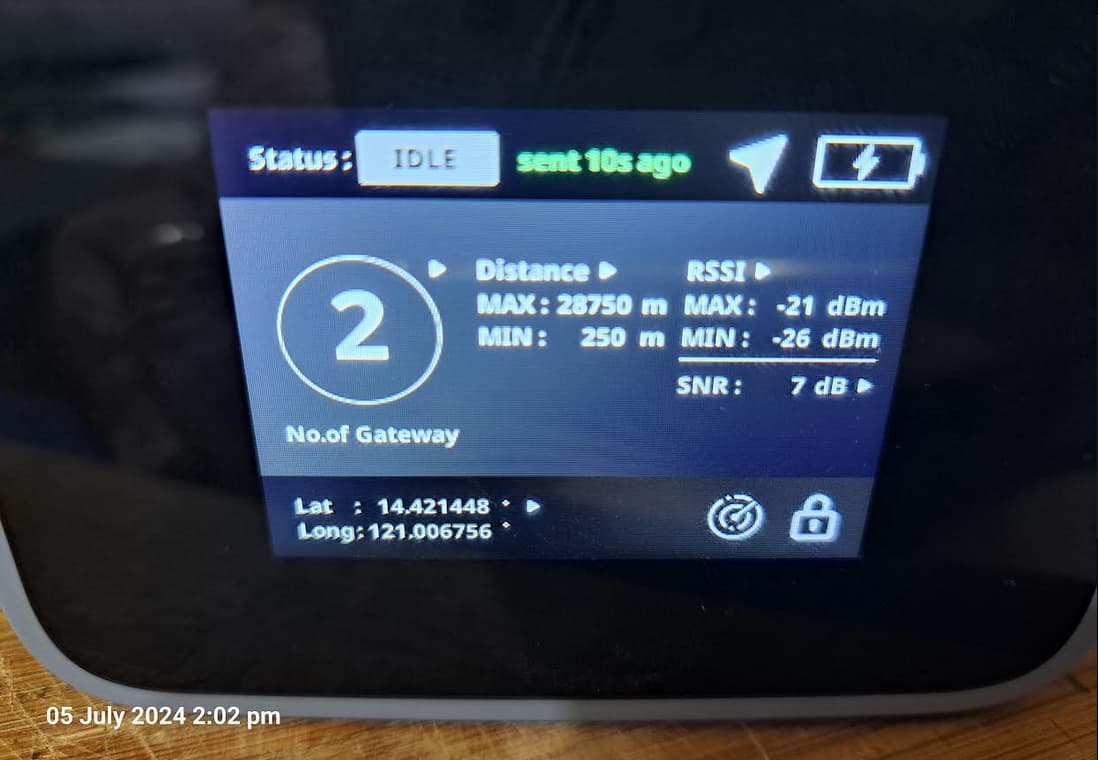
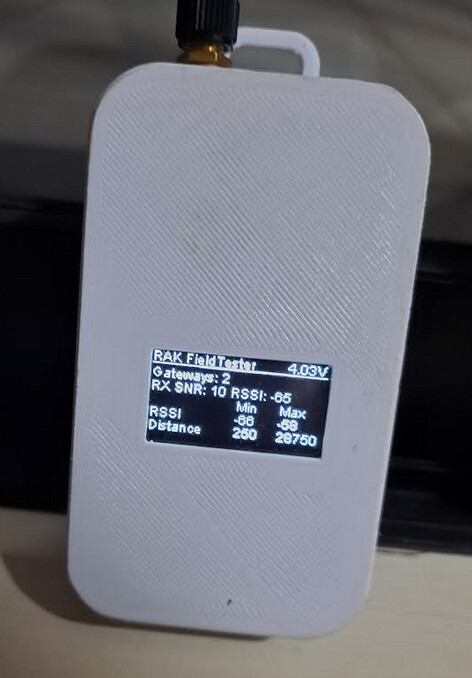
- number of gateways
- min and max distance between the RAK10701 and the gateways
- min and max RSSI levels
![]() IMPORTANT
IMPORTANT
To use this NodeRED node, you need to install NodeRED on a server that can access the MQTT broker of Chirpstack. Please check the NodeRED documentation about installation options.
![]() NOTE
NOTE
This guide is made for the usage with a Chirpstack V4 LoRaWAN server. Connections to other LoRaWAN servers require changes in the node setup. You can find more details in Field Tester Server
![]() IMPORTANT
IMPORTANT
This guide is limited to setup the backend server. It does not cover the required steps to register the RAK10701 Field Tester in Chirpstack.
The setup of the Field Tester in Chirpstack is obviously required for this backend server to work.
After NodeRED has been installed, start it and select a flow to add the required nodes.
Install the Field Tester Service node
Before starting to setup the flow, the Field Tester Service node needs to be added to the NodeRED palette.
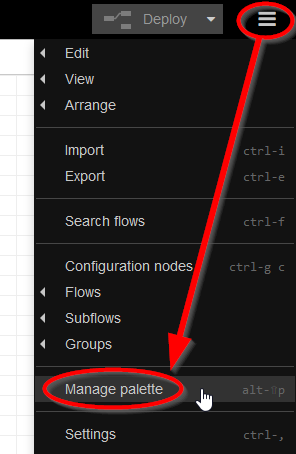
Use the top-right icon in NodeRED and select Manage Palette from the new menu:
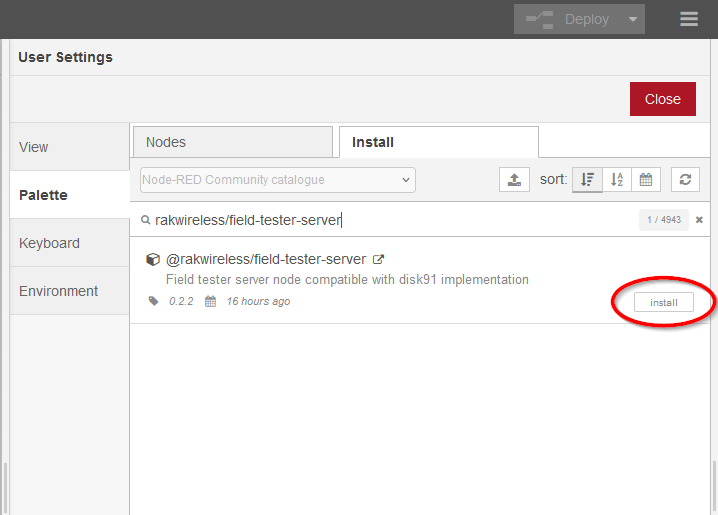
In the new window, select the Install tab and type rakwireless/field-tester-server in the search box. The node will show up in the search result. Install the node with the Install button.
Once the node is installed, we can start to setup the NodeRED flow.
Input Node
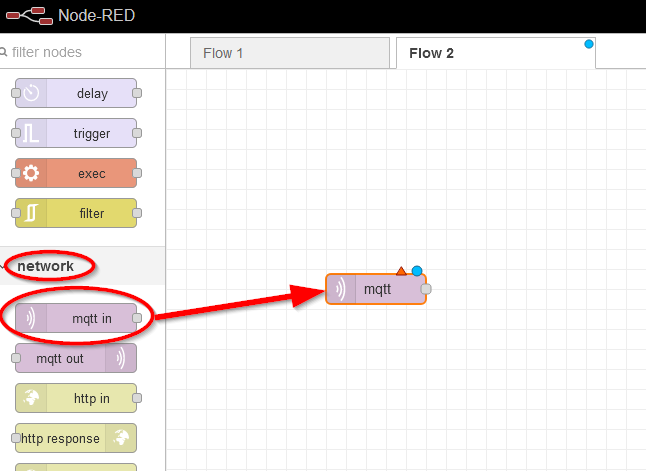
For Chirpstack V4 we need first an input node that can receive information from Chirpstacks MQTT broker. Pull the mqtt in node from the left side bar to your flow:
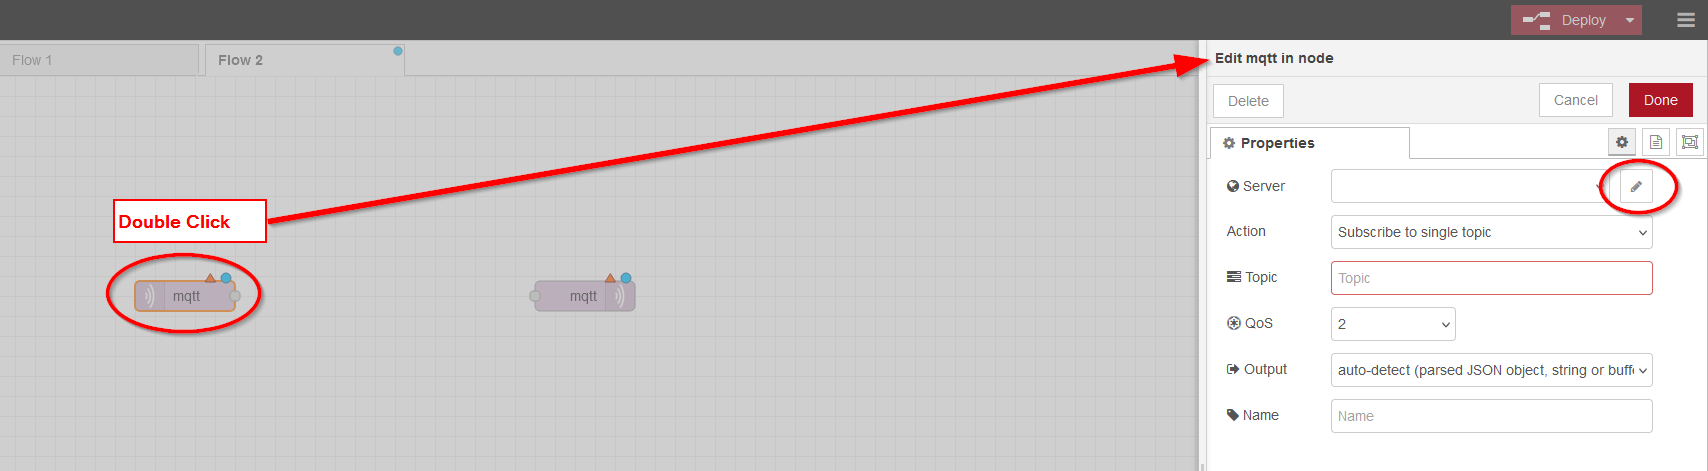
To setup the MQTT connection, double click the mqtt node to open the setup window. Then click on the Server Edit icon.
In the setup window, add your server connection in the Connection tab:
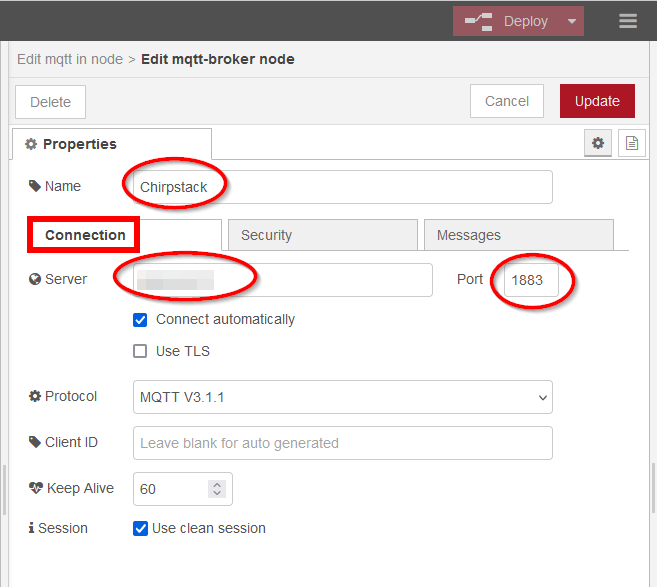
Server can be an URL or an IP address where your Chirpstack MQTT broker can be reached. This and the port number depends on your Chirpstack installation and MQTT settings.
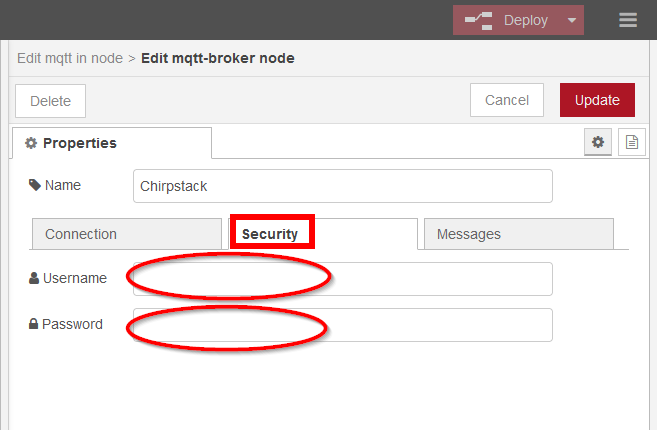
Next go to the Security tab and enter the required user name and password. Again this depends on your MQTT settings:
To receive the data from the MQTT broker, we need to setup the topic we want to listen to.
The first step is to get the ID of the application in Chirpstack:
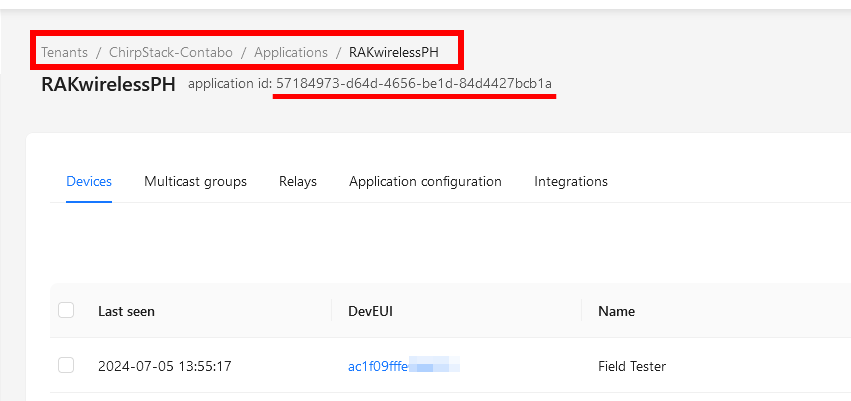
Copy the application ID, to use it in the MQTT input node to setup the topic.
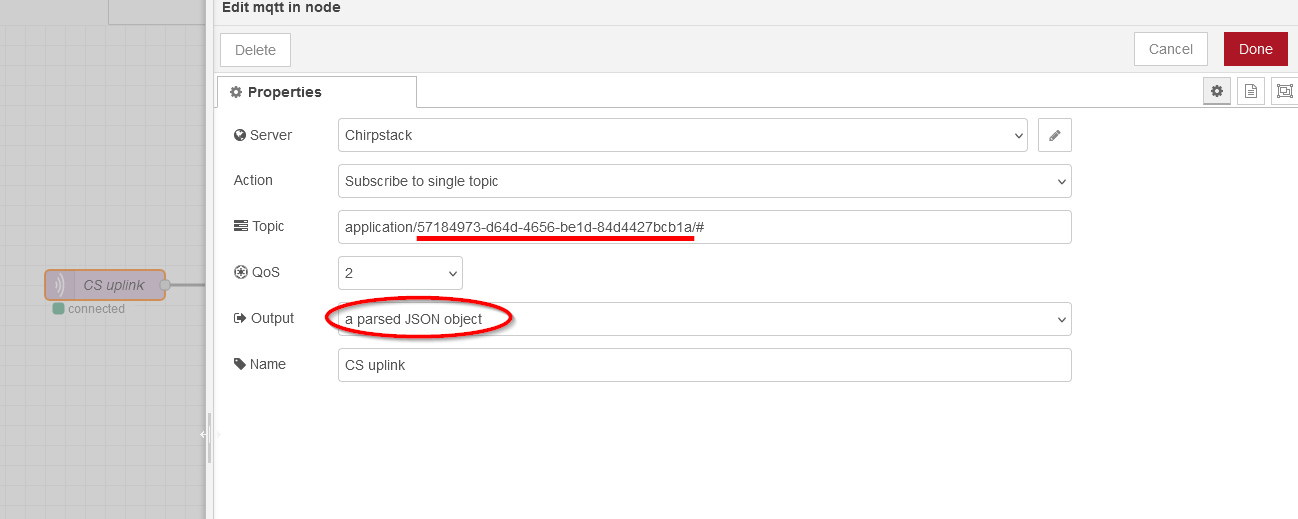
Open the MQTT input settings in the NodeRED flow by double clicking on the icon in the flow.
Then edit the topic field. The syntax is:
application = fixed
application ID = from the Chirpstack LNS application
# = get all messages
In this example the topic is
application/57184973-d64d-4656-be1d-84d4427bcb1a/#
Select as Output the option a parsed JSON object.
Output Node
We need as well an output node to be able to send downlinks to the Chirpstack MQTT Broker.
Pull the mqtt out node from the left side bar to your flow:
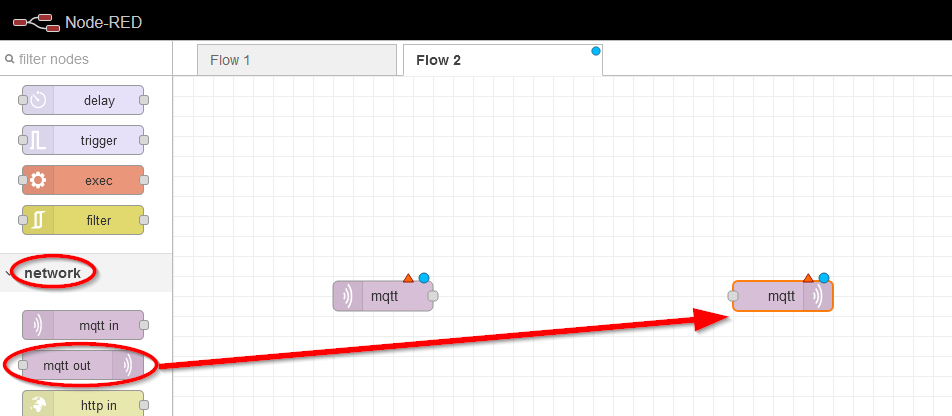
The only setup required is the select the same server that is used in the mqtt in node.
Field Tester Backend Node
Now we can add and setup the Field Tester Server node.
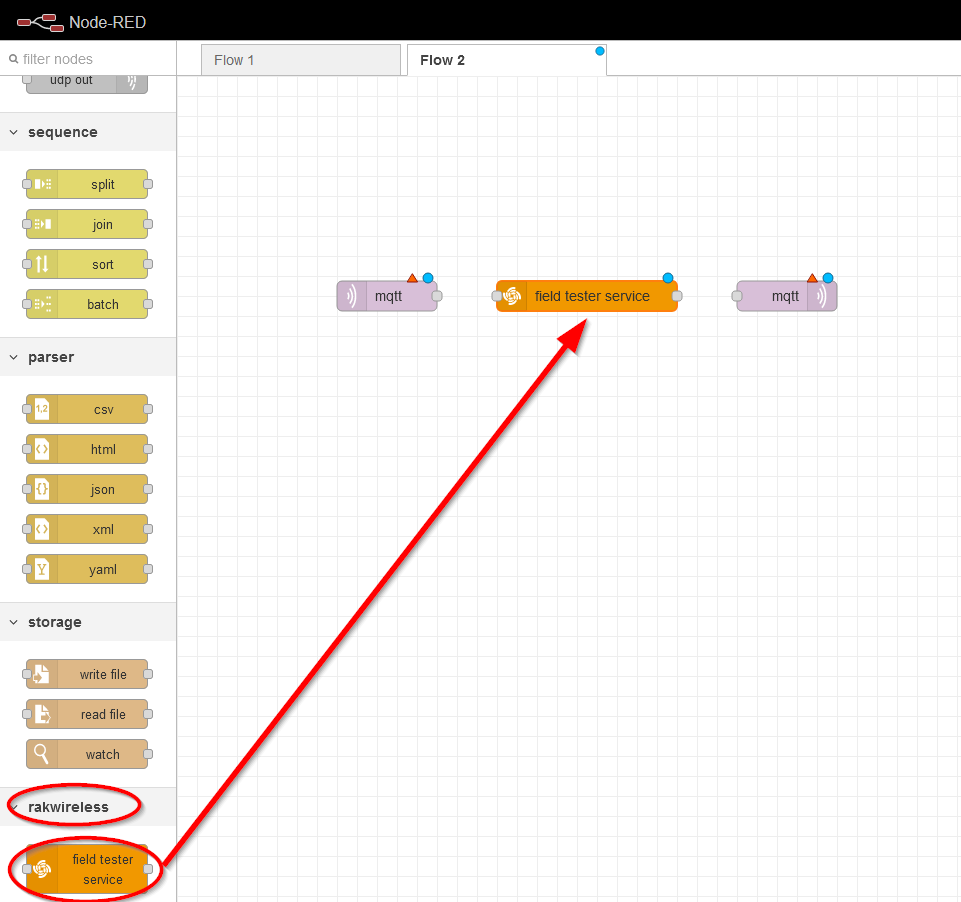
Pull the field tester service node from the left side bar to your flow:
Double click on the new node to setup the parser:
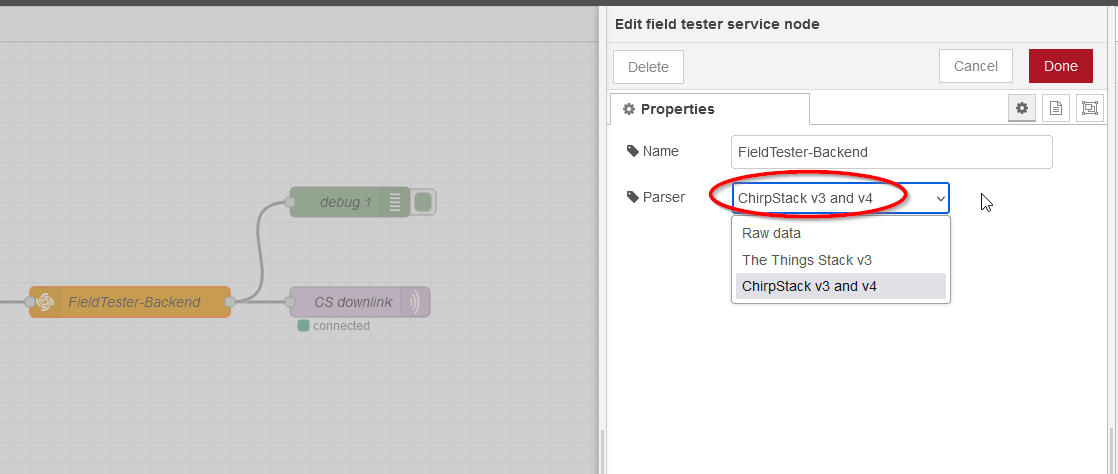
For this example, the required parser is Chirpstack v3 and v4.
![]() NOTE
NOTE
The Field Tester Service node can be used with other LoRaWAN servers as well. Depending on the server and the options to receive uplinks and create downlinks, additional nodes might be required to convert this data into Raw data before sending it to the Field Tester Service.
However, guides how to use it with other LNS are not available at this time.
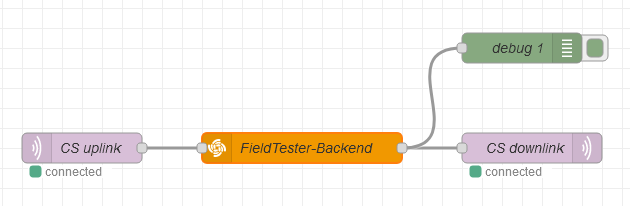
Connect the nodes
The last step is to connect the nodes:

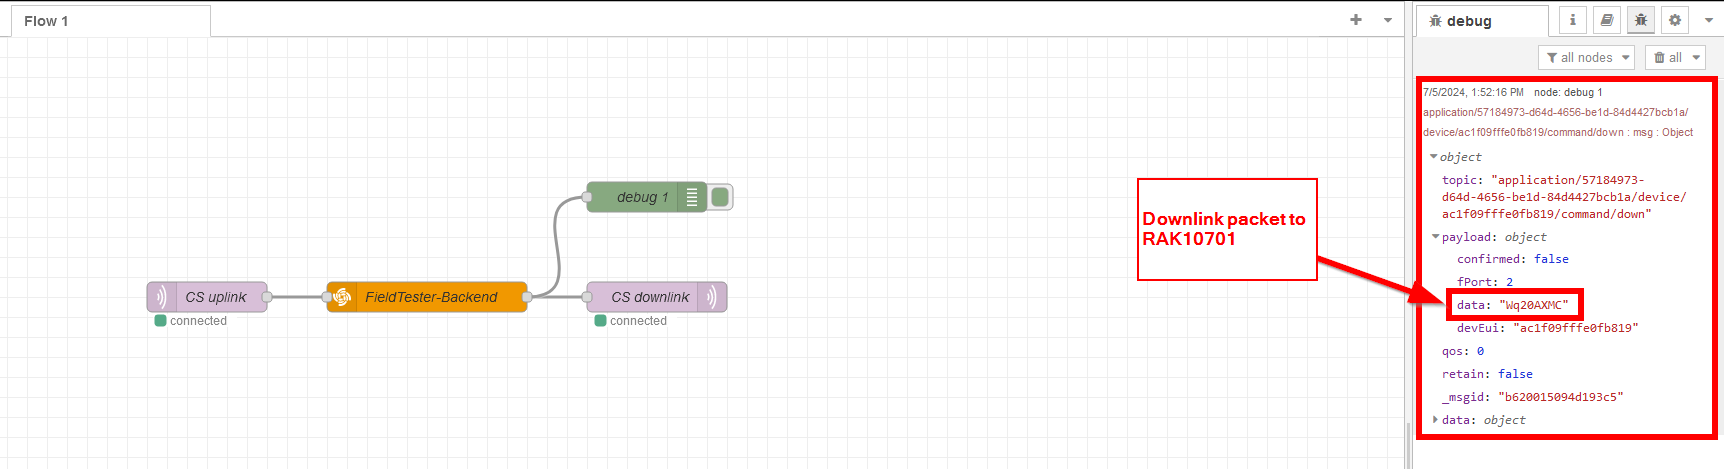
For debugging, it will be helpful to add a debug output node to the flow. This helps to check whether the output of the parser is correct:
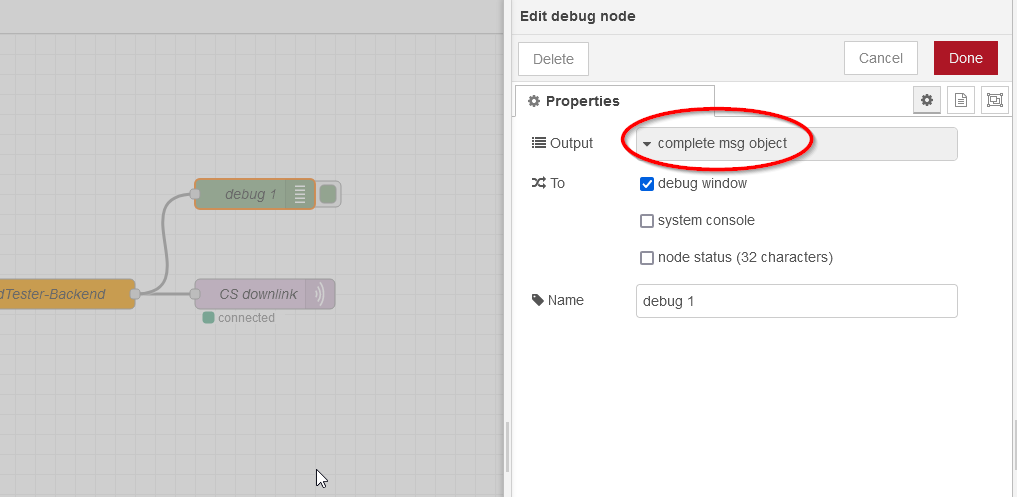
Select complete msg object as output.
The result of parser can then be checked on the right side in the debug window:
That’s all, as said, a simple implementation of a backend server for the RAK10701 Field Tester.
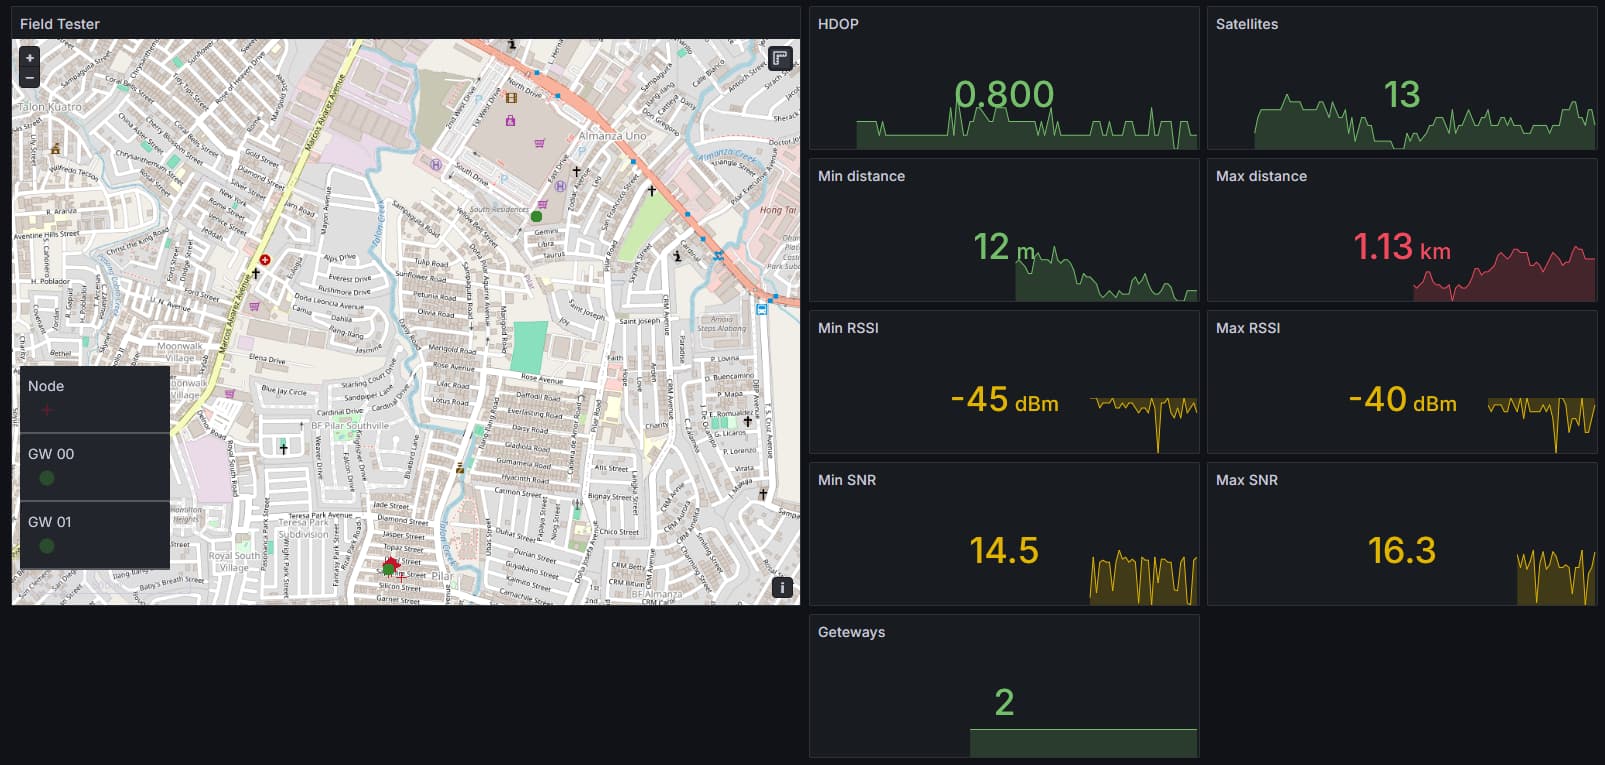
Of course the uplink packets from the Field Tester can be send in parallel to Datacake for a visualization of the locations, but in this case there is no need to setup the downlink procedure in Datacake.
![]() CREDITS
CREDITS
All credits for the Field Tester Service node go to Xose from RAKwireless!