RAK4200 and RAK811 Breakout Board

Issue:
I have a couple of issues:

  1. Everytime I try to connect to OTAA TTN and send a frame it comes up with Error-99 meaning it has not joined TTN properly
  2. When I do connect via ABP and send frames every 4-10 packets comes through, I used a Arduino and Micropython setup with a basic RFM95W and it works like a charm, the RAK is problematic
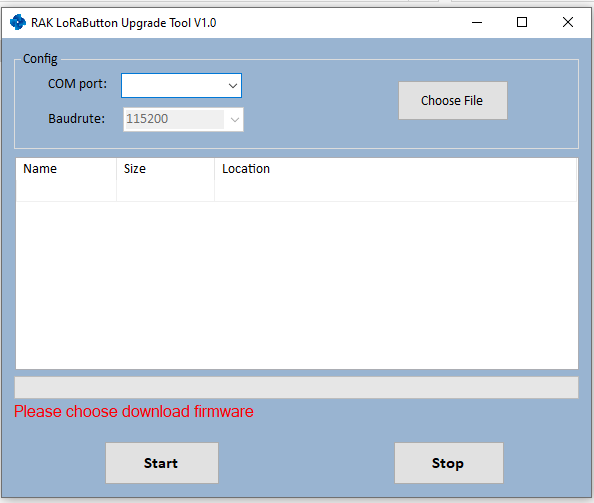
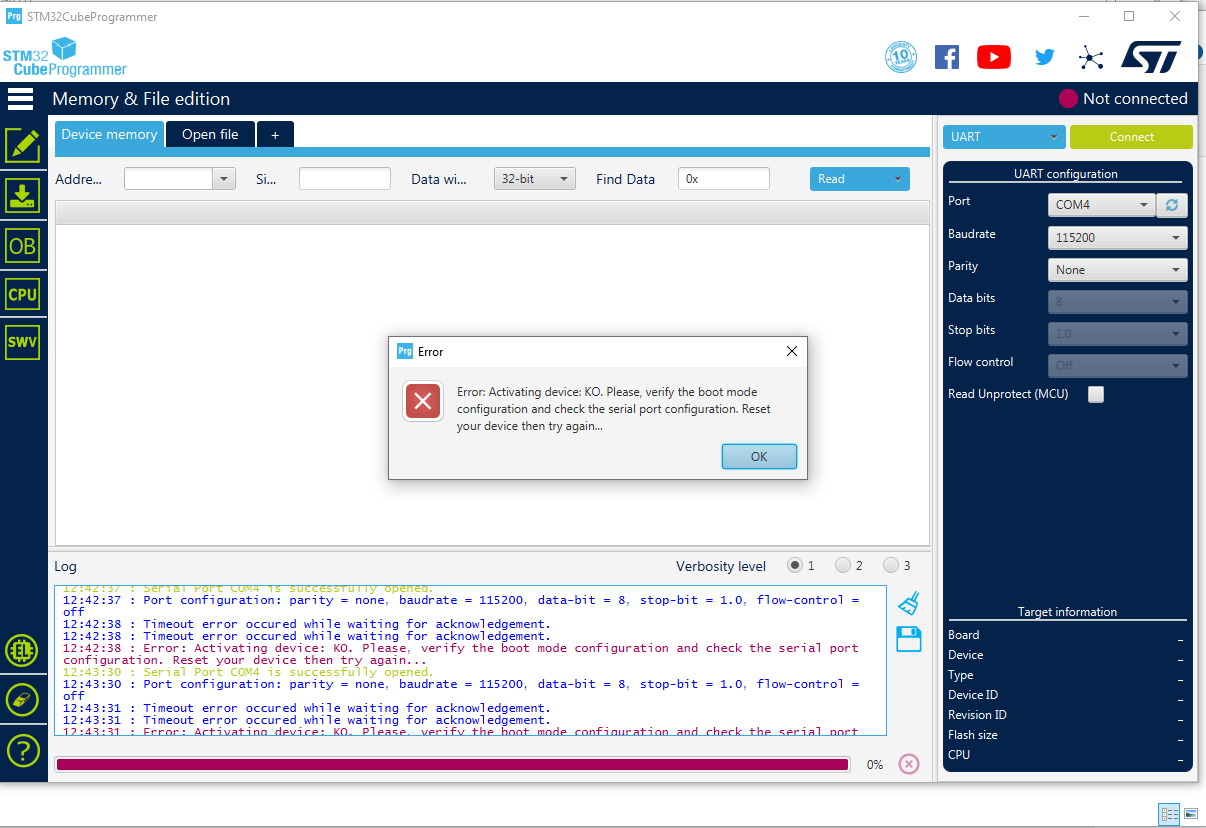
  3. With the RAK4200 I cannot do a firmware update I put it into boot mode but the firmware updater times out and doesnt connect.
  4. The RAK811 only allows at+version all the other AT commands do not work?

I am using the RAK serial port tool so it connects and I can see the devices by AT commands.

Has anyone had these issues?

Dear Jamesļ¼Œ

When you enter boot mode, only the version number command will be recognizedļ¼

You can jump this mode by command:at+run

Please tell me you using version:bootloader and firmware!

Hi Nick,

Sure. For the RAK4200 firmware version is:
OK V3.2.0.14.beta4

The RAK811:
Cant seem to reach it now? Is there any way to send it into flash mode using boot pin and then send the firmware as I tried:

But it didnt want to flash?

Any ideas?

Actually both boards cant be flashed. This is probably my main problem.

Dear Jamesļ¼Œ

You canā€™t get any log when you connect RAK811 USB-UART?

Hi Nick,

No I get nothing I used to be able to only send at+version now no response?

Which firmware tool did you use?

Hi Nick,

Just the standard one:

I tried putting it into boot mode with:
image

But still no luck just wont initiate a firmware upgrade just complains it cant open port! Very frustrating since I paid a lot of money for these boards!

I know perception of value for money is relative, but they are about half the price of the Adafruit Feather M0 LoRa.

But regardless of price they should still work. And they do, for stable releases like the ones on the download site.

Youā€™ll need to flash the boot loader from the download section. This will require a ST-Link or compatible programmer. This will overwrite everything & you can then use the v1.0 tool to download the firmware from the downloads section.

Do not use the new v1.4 tool, it is for firmware that is about to be released, which appears to be on the RAK4200 youā€™ve got.

Refreshing the bootloader and loading the released firmware has always been a definitive solution for me so far.

If the ST-LINK software verifies, you can move on to using the firmware tool and itā€™s all good.

Hi Nick,

Could I bother you to send me the link on how to do it as I had it but lost the link for the insrtuctions.

Thanks greatly,
James

https://docs.rakwireless.com/
https://downloads.rakwireless.com/LoRa/

Hi Nick,

Cant seem to find anything from those links? Is there a direct link that demonstrates how this can be done?

Thanks,
James.

You may want to try Googling for ā€œHow to use an ST-Linkā€ to find a tutorial that suits - I donā€™t have a recommended one.

Dear Rodgerthat3000,

Is there any problem with the firmware in the board? Why did you re-burn it?

Thereā€™s something you need to knowļ¼š

V3.2.0.14. Beta4 belongs to the latest version. It is very important that previous versions of V3.2.0.14 have different burning practices and use with the latest version.

Now I tell you the solution to restore the latest firmwareļ¼š

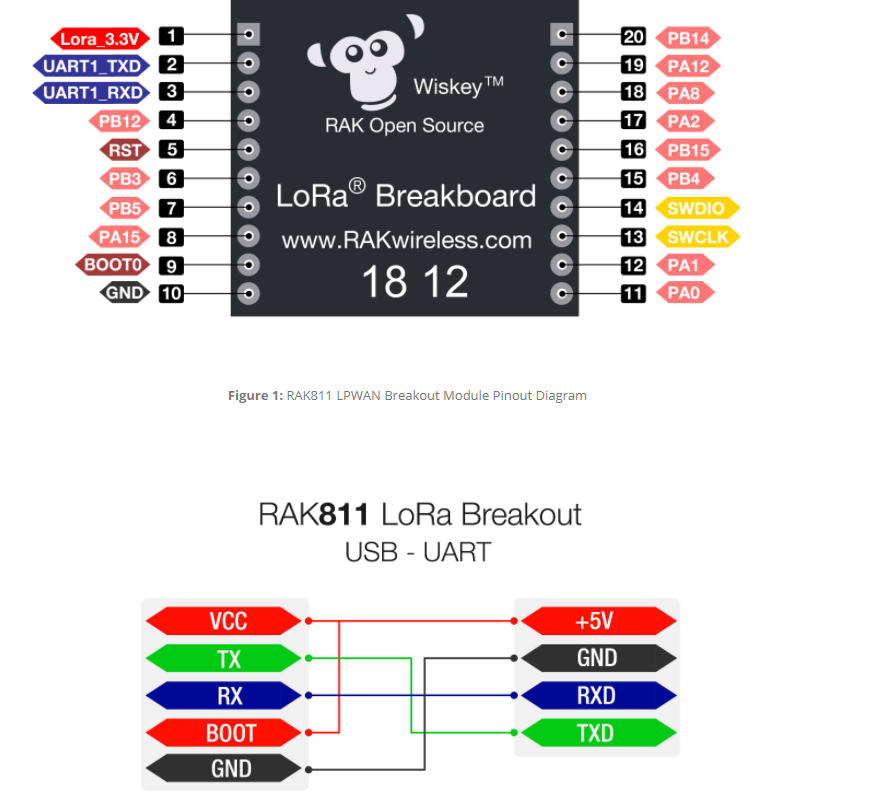
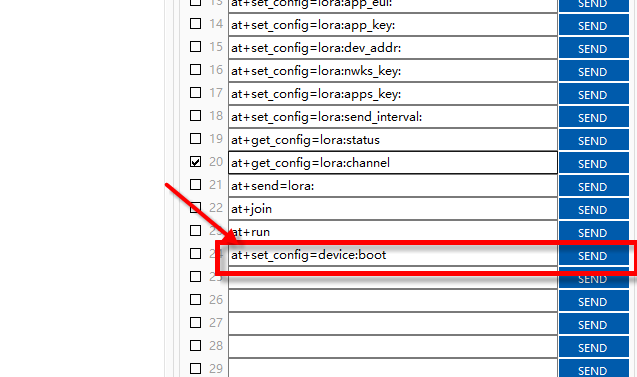
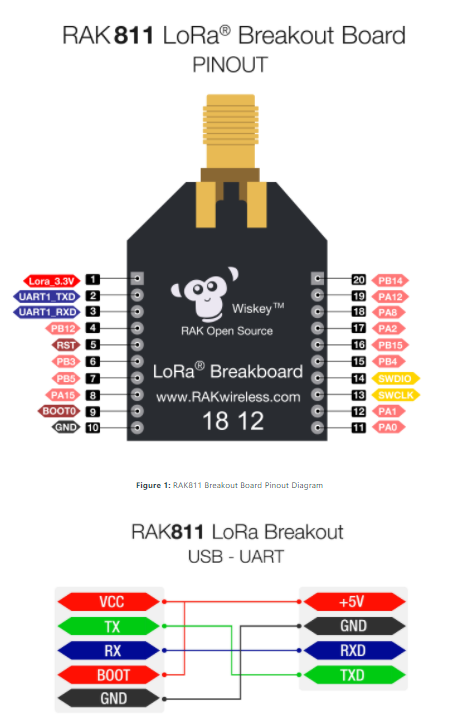
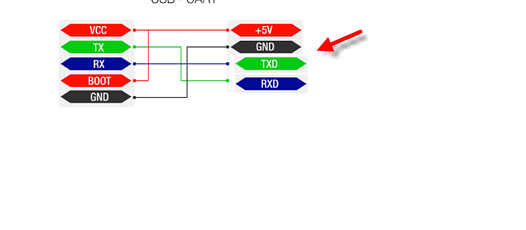
1.Connect serial port as shown in the figure below,

2.Download and Install the STM32CubeProgrammer Software from STMicroelectronics on your Windows PC.

3.Open the STM32CubeProgrammer Software and Select UART type.

  • Choose the appropriate port number in the COM Port field.

  • Set the Baud Rate to 115200,then Press Connect.

4.Now that you have successfully connected your RAK811 to the STM32CubeProgrammer Tool, letā€™s burn the hex file into the RAK811.

  • In the STM32CubeProgrammer, Click the " Erase Chip " button to erase all the data on RAK811:

  • Click " Open File " and select the correct hex file
    (Please send me an email and Iā€™ll give you the latest HEX fileļ¼š[email protected])

  • Click the " Download " Button to start the burning

5.After a couple of seconds, you will see that you have successfully burned the Bootloader to your RAK811!

Best regards!

Hi Nick,

I get this error when I try to connect:

Dear Jamesļ¼Œ

Can you send me the connect picture?

Maybe you donā€™t connect to the boot and VCC!

@rodgerthat3000, you appear to be replying to @Nicholas but have addressed me ā€¦

Hi Nick,

Yeah sorry I got lazy and just called Nicholas Nick hehe

Thanks fo your help so far ā€¦

Hi Nicholas,

Yes I did connect the Boot and VCC correctly ā€¦ I have been doing this for a very long time and usually dont miss those little details ā€¦ its weird that TX -> TX and RX -> RX could it be a mistake?

OMG Nicholas you REALLY need to fix that diagram. I reversed TX and RX and it works really well now.

I would advise so your other customers dont get frustrated like myself, please update the diagram asap.

The correct diagram should be:
image

2 Likes